There's something magical about stepping into a softly illuminated garden at dusk. The right outdoor lighting transforms your landscape from ordinary to extraordinary, extending your living space and creating that coveted Scandinavian hygge feeling beneath the stars. Whether you're lighting a winding garden path, highlighting architectural features, or simply adding safety to your outdoor areas, installing outdoor landscape lighting is a weekend project that delivers years of evening enchantment.
This comprehensive guide will walk you through the complete process—from planning your circuit layout to burying the final wire. By the end, you'll understand not only the technical aspects of low voltage landscape lighting installation but also how to select fixtures that elevate your outdoor space with intentional, curated design. Let's illuminate your path forward.

Planning Your Outdoor Lighting Design
Before you lift a shovel or unwrap a single fixture, thoughtful planning ensures professional results. Start by walking your property at dusk to identify natural focal points—that sculptural Japanese maple, your beautiful garden path, or architectural elements worth showcasing.
Create a lighting zones map for your landscape. Divide your outdoor space into functional areas: pathways requiring safe navigation, ambient zones for entertaining, and accent spots for visual interest. Sketch the layout, noting distances between your power source and each fixture location. Most low voltage systems can maintain brightness up to 100 feet from the transformer, but planning your wiring runs efficiently prevents voltage drop issues.
Consider the Scandinavian design principle of lagom—not too much, not too little. Your outdoor lighting should feel balanced and harmonious rather than overwhelming. A general rule is to use fewer, higher-quality fixtures positioned strategically rather than saturating every corner.
Understanding Your Electrical Requirements
Low voltage landscape lighting operates at 12 volts (versus the 120 volts in your home), making it significantly safer for DIY installation. However, understanding your power needs prevents system overload. Calculate your total wattage by adding the wattage of all planned fixtures, then select a transformer rated for at least 20% more capacity to allow for future additions.
For those seeking even simpler alternatives, explore a curated collection of outdoor lighting options that require no electrical knowledge whatsoever.
Choosing Between Wired and Solar Systems
The modern homeowner faces a pleasant dilemma: traditional wired systems or solar alternatives? Each approach offers distinct advantages depending on your property, budget, and aesthetic goals.
Wired low voltage systems deliver consistent, reliable illumination regardless of weather or season. They're ideal for permanent installations where you want dependable brightness every evening. These systems require initial installation effort but reward you with reliable performance and the ability to control timing via photocells or smart home integration.
Solar landscape lighting has evolved dramatically in recent years. Modern solar path lights offer impressive runtime and warm, inviting color temperatures. They're perfect for renters, temporary installations, or areas where running wire poses challenges. The best solar options now feature efficient panels and quality batteries that deliver 8-12 hours of illumination.


Step-by-Step Installation Guide
Ready to bring your lighting vision to life? This section covers the essential installation process for low voltage wired systems. For visual learners, we've included a comprehensive video demonstration below.
Step 1: Install Your Transformer
Mount your transformer adjacent to an outdoor GFCI outlet. Choose a location that stays dry and allows easy access for programming or maintenance. Most transformers include mounting hardware and a photocell eye for automatic dusk-to-dawn operation.
Step 2: Lay Out Your Wire Path
Unroll your low voltage cable along your planned lighting zones without burying it yet. This dry run lets you verify distances and make adjustments before committing to trenching. Use 12-gauge wire for runs up to 100 feet; upgrade to 10-gauge for longer distances or high-wattage installations.
Step 3: Connect Your Fixtures
Attach your path lights, spotlights, and accent fixtures using waterproof wire connectors. Low voltage systems use simple two-wire connections—no need for complex electrical work. Ensure all connections are tight and properly sealed against moisture.

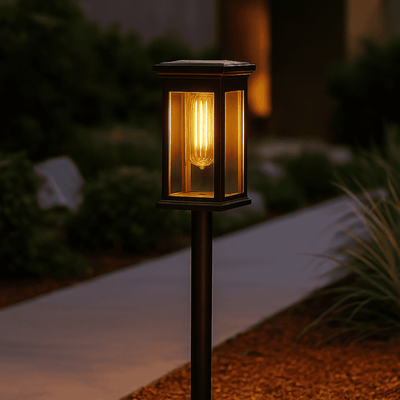
Stiglys Waterproof LED Garden Path Post Light
$219.00 $319.00
Complete your wired landscape lighting installation with this IP65 waterproof AC hardwired post light. Choose from four heights and warm or cold white LED options for perfect pathway illumination.
Explore ProductThe Stiglys Waterproof LED Garden Path Post Light represents an excellent choice for wired pathway installations. Its IP65 waterproof rating and hardwired AC connection ensure reliable performance through every season, while the Scandinavian minimalist design complements any outdoor aesthetic perfectly.

Step 4: Test Before Burying
Power on your system to verify all fixtures illuminate correctly. Walk the entire installation, checking for dark spots or inconsistent brightness. This testing phase is crucial—it's much easier to troubleshoot above ground than after burying your wires.
Step 5: Bury Your Cable
Landscape wire should be buried 6 to 8 inches deep in most jurisdictions. This depth protects the cable from gardening activities while keeping it accessible for future modifications. Use a flat shovel to create a narrow trench, lay the cable, and tamp the soil back into place. Where wire crosses under lawn areas, consider using conduit for extra protection.
Common LED Lighting Mistakes to Avoid
Even experienced DIY enthusiasts can fall into these common traps. Recognizing potential pitfalls before they happen saves time, money, and frustration.
Over-illuminating your landscape creates harsh, uninviting spaces. Remember the Scandinavian principle of restraint—your lighting should guide and accent, not overwhelm. Dark spaces between fixtures create visual rest and actually enhance the illuminated areas.
Ignoring color temperature consistency results in a patchwork of cool blue-white and warm amber light. For residential landscapes, stick to 2700K-3000K warm white throughout your installation. This consistent warmth creates that cozy, inviting atmosphere that makes outdoor spaces feel like true extensions of your home.
Poor transformer sizing causes dimming and inconsistent performance. Always size up—if your total fixture wattage is 150 watts, choose a 200-watt transformer. This headroom accommodates future additions and prevents your system from operating at maximum capacity continuously.
Neglecting fixture maintenance access might not cause immediate problems, but burying fixtures too deeply or landscaping over connection points makes future bulb replacement or troubleshooting unnecessarily difficult.


Solar Alternatives and Decorative Finishing Touches
For those who prefer simplicity or need lighting in areas far from electrical sources, modern solar options offer remarkable performance. The latest generation of solar path lights delivers consistent warm white illumination with minimal environmental impact—no wiring, no transformers, no electricity bills.
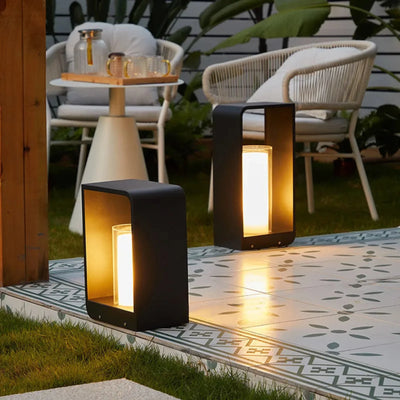
Beyond functional path lighting, consider how decorative elements complete your outdoor sanctuary. The right combination of task lighting and ambient fixtures creates layered illumination that feels both practical and artfully designed. This is where Scandinavian design sensibility truly elevates your outdoor space.
Lighting Solutions for Every Approach

Solsti Solar Outdoor Path Lights 2700K Warm White
$119.00
$149.00
Want lighting without any wiring? These Scandinavian-designed solar path lights offer 12-hour runtime with automatic dusk-to-dawn operation. Available in 6-pack or 12-pack configurations. Learn more ➔

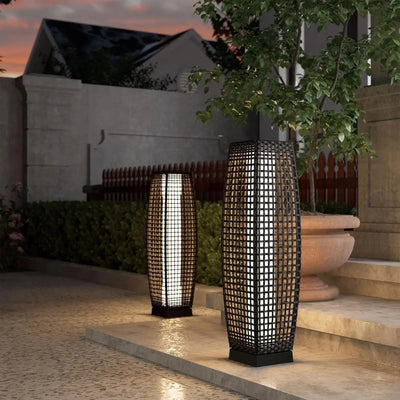
Solvik Art Deco Solar Outdoor Patio Floor Lamp
$99.00
$179.00
Add a decorative statement piece to your completed outdoor setup with this solar-powered Art Deco floor lamp. Beautiful iron construction requires zero wiring for warm ambient lighting. Learn more ➔
The Solsti Solar Outdoor Path Lights 2700K Warm White eliminates wiring complexity entirely while delivering that coveted 2700K warm white glow. Simply stake them along your pathways and let the Scandinavian design speak for itself.
For those seeking statement pieces that anchor outdoor seating areas, the Solvik Art Deco Solar Outdoor Patio Floor Lamp combines Art Deco elegance with solar convenience. Its iron construction and warm ambient output create an inviting focal point for evening gatherings.

Final Thoughts: Creating Your Outdoor Sanctuary
Installing outdoor landscape lighting successfully transforms not just your property, but your relationship with your outdoor spaces. The evening hours become usable extensions of your home—safe, beautiful, and intentionally designed. Whether you choose a fully wired system for permanent elegance or solar solutions for flexible simplicity, the principles remain the same: thoughtful placement, consistent warmth, and quality fixtures that honor both function and form.
Your journey from planning to completion deserves fixtures that reflect your commitment to quality. At Skonne, we curate outdoor lighting that embodies Scandinavian design principles—minimalist, warm, and enduring. From pathway essentials to statement floor lamps, our collection helps you create that perfect outdoor hygge atmosphere.
Ready to illuminate your evenings? Explore our complete selection of outdoor lighting solutions and discover how intentional design transforms your landscape into a sanctuary.
Frequently Asked Questions about Installing Outdoor Landscape Lighting
No, you do not need an electrician to install low voltage landscape lighting (12V systems). These systems transform standard household current to a safe low voltage that poses minimal risk. However, if you're uncomfortable working with electrical components or need to install a new outdoor GFCI outlet, consulting a professional is recommended. Solar landscape lighting requires no electrical knowledge whatsoever.
Common mistakes include over-illuminating the landscape instead of creating subtle accent lighting, mixing different color temperatures (cool and warm white) which looks unprofessional, undersizing the transformer which causes dim performance, poor fixture spacing creating dark spots, and burying wire too shallow, risking damage from gardening activities. Additionally, many DIYers neglect to test the complete system before burying cables, making troubleshooting much more difficult.
Yes, most homeowners can install low voltage landscape lighting themselves with basic tools and following proper instructions. Low voltage systems (12V) are designed for DIY installation and don't require electrical permits in most areas. You'll need a shovel for trenching, wire strippers, waterproof connectors, and basic hand tools. Solar landscape lighting is even simpler, requiring only stakes and placement. Plan for a weekend project, follow manufacturer specifications for your transformer, and always call 811 before digging to locate underground utilities.
The rule of thumb for outdoor lighting emphasizes restraint and purpose. Use the "less is more" approach—highlight key architectural features and pathways rather than flooding the entire property with light. Space path lights 6-8 feet apart for consistent illumination without over-lighting. Position accent lights to graze interesting textures rather than direct frontal lighting. Keep all fixtures at a consistent color temperature (2700K-3000K warm white for residential settings). And remember that darkness is an important design element—it's the contrast between light and shadow that creates visual interest and ambiance.
Landscape lighting wire should be buried 6 to 8 inches deep in most jurisdictions. This depth protects the cable from aeration, edging, weeding, and other routine gardening activities while keeping it accessible for future modifications if needed. In areas subject to frost heave or heavy foot traffic, consider adding conduit or burying slightly deeper. Always check local codes, as some municipalities have specific requirements. Before digging any trench, call 811 to have underground utilities marked—this free service prevents dangerous and costly accidents with gas, water, or electrical lines.