Planning your living room recessed lighting can feel overwhelming. You know you want clean, ambient illumination that washes your space in warmth rather than harsh shadows—but where exactly should those can lights go? How far apart should you space them? And how do you avoid the common mistake of creating a ceiling that looks like a constellation of randomly placed dots?
Whether you're renovating your lounge or designing a new space, understanding proper layout and spacing is essential to achieving that coveted Scandinavian-inspired glow. In this guide, you'll discover the spacing formulas professional designers use, learn how to calculate the ideal placement for your ceiling height, and understand why recessed lighting works best as part of a layered approach. Along the way, we'll introduce you to complementary lighting pieces that transform a basic recessed system into a curated, inviting atmosphere—exactly the kind of intentional design Skonne celebrates.
Why Recessed Lighting Is Essential for Modern Living Rooms
Recessed lighting has become a cornerstone of contemporary interior design for good reason. Unlike pendant lights or chandeliers that command visual attention, can lights recede into your ceiling (hence the name) to create a seamless, uncluttered aesthetic. This makes them particularly well-suited to Scandinavian and minimalist spaces where clean lines and open sightlines reign supreme.
The true power of living room recessed lighting lies in its ability to provide consistent, shadow-free ambient illumination across your entire space. When properly planned, recessed lights eliminate dark corners and create an even wash of light that makes your room feel larger and more welcoming. They're the foundation upon which all other lighting layers build—the quiet workhorse that ensures your space functions beautifully from morning coffee to evening gatherings.
However, the key phrase here is "properly planned." A poorly executed recessed lighting layout can leave you with uneven brightness, harsh shadows, or that dreaded "spotlight effect" where every seat in your living room feels like an interrogation chair. That's why understanding spacing formulas and placement strategies isn't just helpful—it's non-negotiable.
The Golden Rule: The Recessed Lighting Spacing Formula
Here's the formula professional designers swear by: Divide your ceiling height by two to determine optimal spacing. It's elegantly simple yet remarkably effective.
The Formula: Ceiling Height ÷ 2 = Distance Between Lights (and Distance from Walls)
Let's break this down with examples:
- 8-foot ceilings: Place lights 4 feet apart, and 4 feet from walls
- 9-foot ceilings: Place lights 4.5 feet apart, and 4.5 feet from walls
- 10-foot ceilings: Place lights 5 feet apart, and 5 feet from walls
This formula ensures that light cones overlap sufficiently to eliminate dark spots while avoiding excessive brightness in any single area. The equal distance from walls prevents the "cave effect" where perimeter areas fall into shadow—something particularly important in Scandinavian-inspired spaces where you want light to reach every corner and highlight natural materials like wood and linen.
To see this formula in action and understand how it translates to real ceiling planning, watch this practical demonstration:


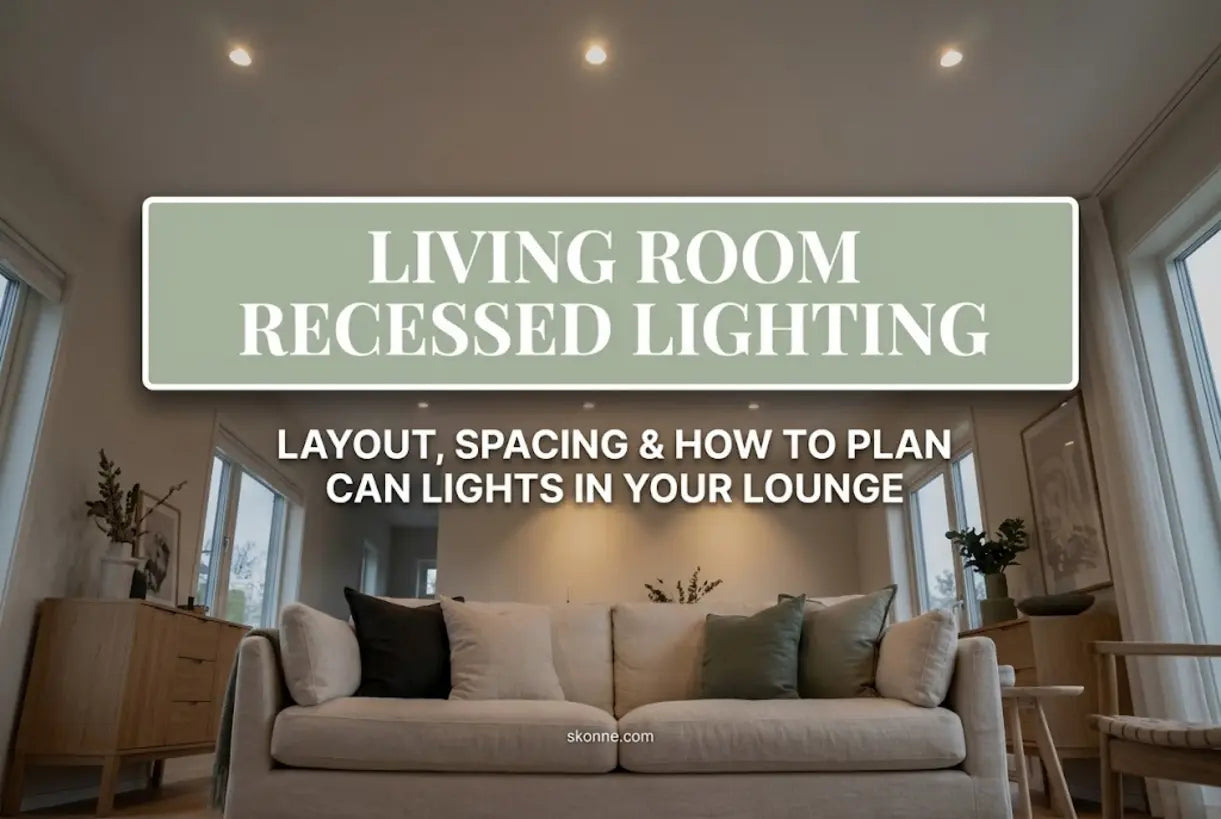
Mapping Your Living Room Recessed Lighting Layout
Once you understand the spacing formula, it's time to map your actual layout. Start by sketching your room to scale on graph paper or using a digital planning tool. Mark permanent fixtures—sofas, entertainment centers, fireplaces, bookshelves—that will influence where light is needed most.
Consider these layout strategies:
The Grid Approach
For open-concept living rooms or spaces with flexible furniture arrangements, a uniform grid pattern works beautifully. Using your calculated spacing, create rows of lights that run parallel to your longest wall. This approach distributes light evenly across the entire room and creates that clean, architectural look so prized in modern Scandinavian interiors.
The Perimeter-Plus-Center Method
For more traditional living room layouts with defined seating areas, consider placing lights around the perimeter of the room plus additional fixtures centered over conversation zones. This approach ensures walls are adequately illuminated (highlighting texture and artwork) while providing directed brightness where people actually gather.
Zoning for Function
If your living room serves multiple purposes—perhaps a reading nook here, a TV-watching area there—consider creating lighting zones with separate dimmer controls. This allows you to illuminate the reading corner while keeping the media area dim, or vice versa. The spacing formula still applies within each zone.
Here's a visual guide to help you visualize proper spacing and layout options:

Beyond the Ceiling: Why Layering Matters
Here's an important truth: recessed lighting alone rarely creates the warm, inviting atmosphere most homeowners crave. This is where the concept of layered lighting becomes essential. Think of your ceiling can lights as providing the foundational ambient layer—necessary and functional, but incomplete without complementary sources.
Consider this common scenario: You've installed the perfect grid of recessed lights using our spacing formula. The room is well-lit, technically speaking. Yet something feels cold, clinical, almost like a doctor's waiting room. That's because overhead lighting, even when well-distributed, lacks the dimensionality and warmth that comes from light at varying heights and intensities.
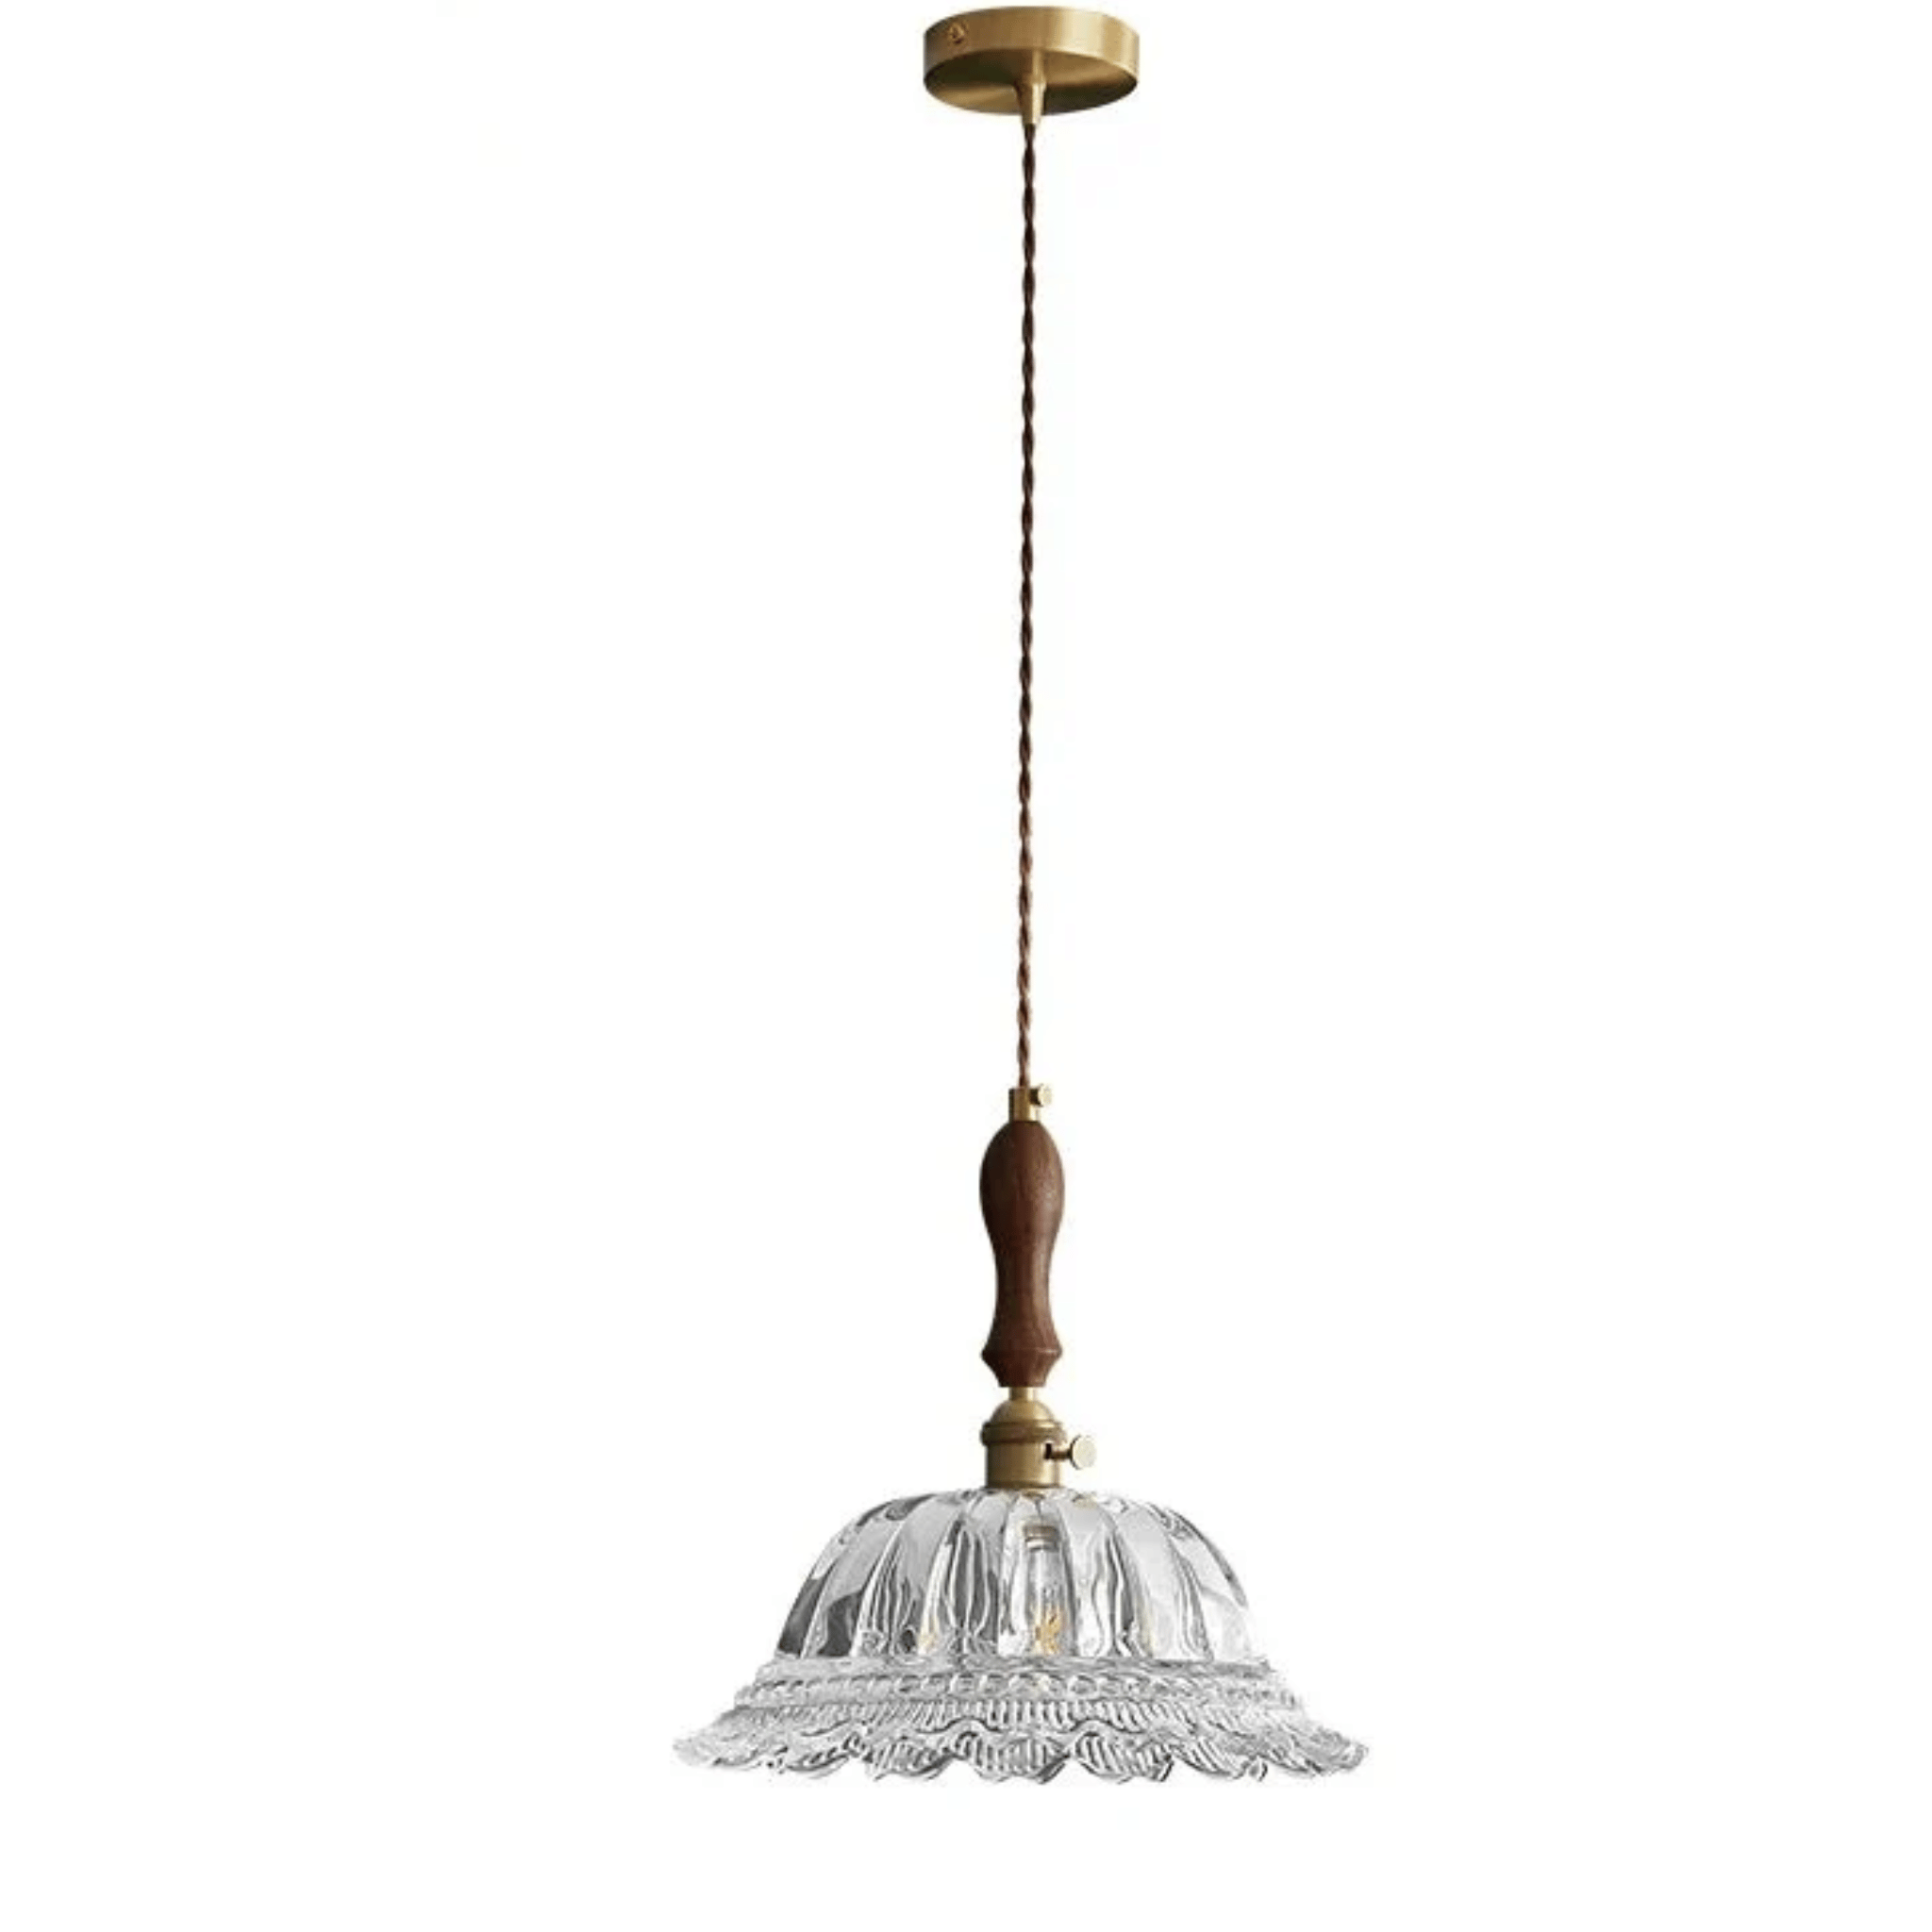
This is where a carefully chosen pendant light can transform your space. The Gloda Walnut Brass French Style Pendant Light exemplifies how overhead lighting can anchor a seating area while adding material warmth that recessed lights alone cannot provide. The rich walnut and brass finishes introduce organic texture and a focal point that draws the eye upward, creating visual interest without cluttering your sightlines.

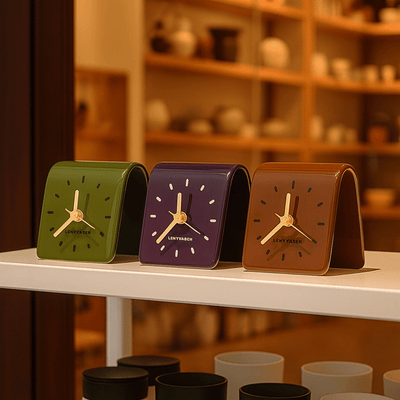
Gloda Walnut Brass French Style Pendant Light
$169.00 $229.00
Layer your living room lighting with this warm walnut and brass pendant that complements recessed ceilings perfectly. Adjustable cord for the ideal height above seating areas.
Explore ProductWhen measuring for your recessed lighting installation, precision matters. Taking careful measurements ensures your spacing formula translates perfectly from paper to ceiling:

Measure twice, cut once—especially when it comes to ceiling openings that are difficult to modify once complete. Mark your planned light positions with painter's tape before committing to cut, and step back to visualize the pattern from multiple angles in the room.
For those seeking complementary pieces that embody the Japandi aesthetic—a blend of Japanese wabi-sabi and Scandinavian functionality—our Japandi Lighting collection offers thoughtfully curated options that pair beautifully with recessed ceiling systems.
Selecting the Right Size and Type
A common question in living room recessed lighting layout planning is: What size fixtures should I choose? The answer depends on your ceiling height, room size, and aesthetic preferences.
4-Inch vs. 6-Inch Fixtures
4-inch fixtures have become increasingly popular in contemporary homes. They're more discreet, create a sleeker ceiling profile, and work beautifully in rooms with standard 8-9 foot ceilings. Their smaller size also allows for more precise placement and tighter spacing when needed.
6-inch fixtures provide broader light distribution and are ideal for larger spaces or higher ceilings (10+ feet). They can also accommodate higher-wattage bulbs, making them suitable for rooms where you need substantial ambient light without installing excessive numbers of fixtures.
Adjustable vs. Fixed Trim
Consider adjustable "eyeball" trims for areas where you might want to highlight artwork, architectural features, or specific furniture arrangements. Fixed trims provide consistent downlighting and are perfect for general ambient illumination. Many Scandinavian-inspired spaces use a combination: fixed trims for the main grid, adjustable trims strategically placed for accent purposes.
Color Temperature Considerations
For living rooms, 2700K to 3000K (warm white) creates the cozy, inviting atmosphere associated with hygge living. Cooler temperatures (3500K+) can feel harsh and clinical in spaces meant for relaxation. When selecting LED recessed fixtures, ensure they're dimmable and properly matched in color temperature across all fixtures.
The Complete Layer: When Recessed Lighting Needs Partners
Now let's address the strategic placement of complementary lighting that transforms a well-lit room into a beautifully lit sanctuary. Recessed lighting provides the foundation, but corner floor lamps and wall-mounted fixtures fill the gaps that overhead sources simply cannot reach.
Floor lamps serve multiple purposes in a layered lighting scheme. They provide task lighting for reading, fill dark corners with warm pools of illumination, and add sculptural presence at eye level. Placed behind seating, they create depth and eliminate the "floating furniture" effect that can occur when everything is lit solely from above.
Wall sconces mounted at approximately eye level (60-66 inches from the floor) add horizontal illumination that complements vertical ceiling lights. This cross-directional lighting eliminates shadows on faces and creates the flattering, welcoming atmosphere that makes guests want to linger.
For those with recessed lighting systems seeking to complete their layered approach, consider these complementary pieces:
Complementary Lighting for Your Recessed System

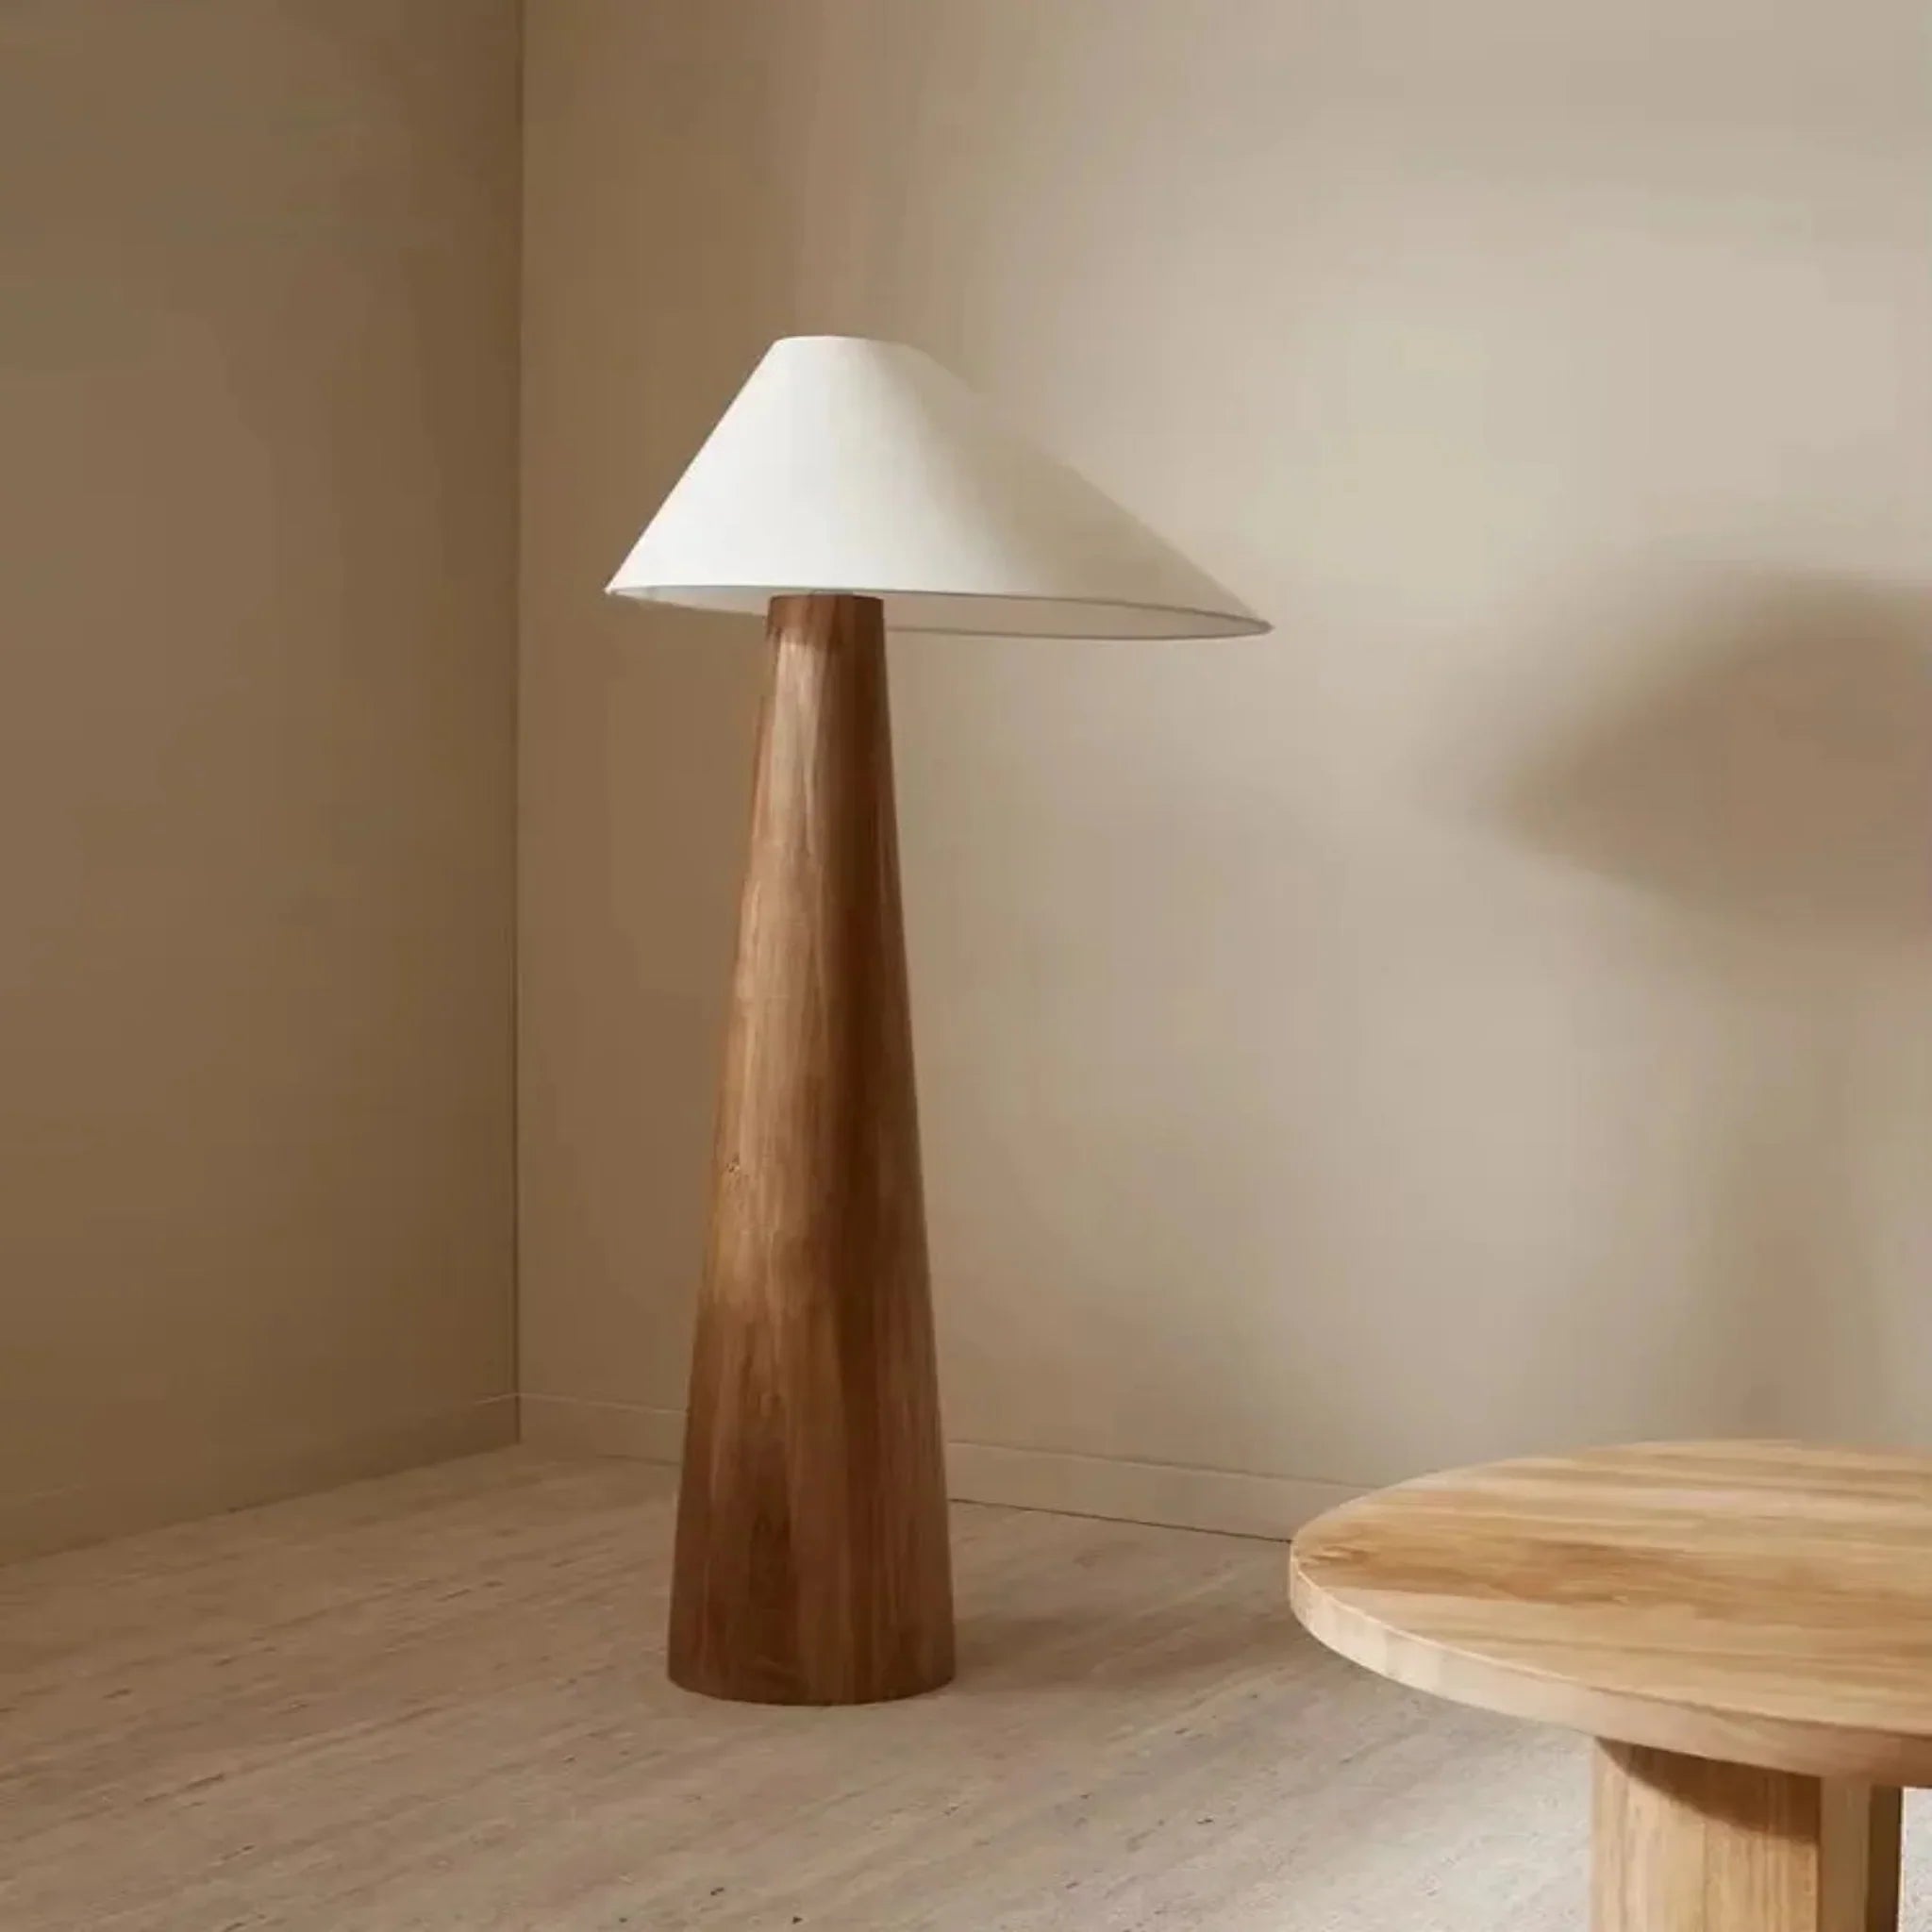
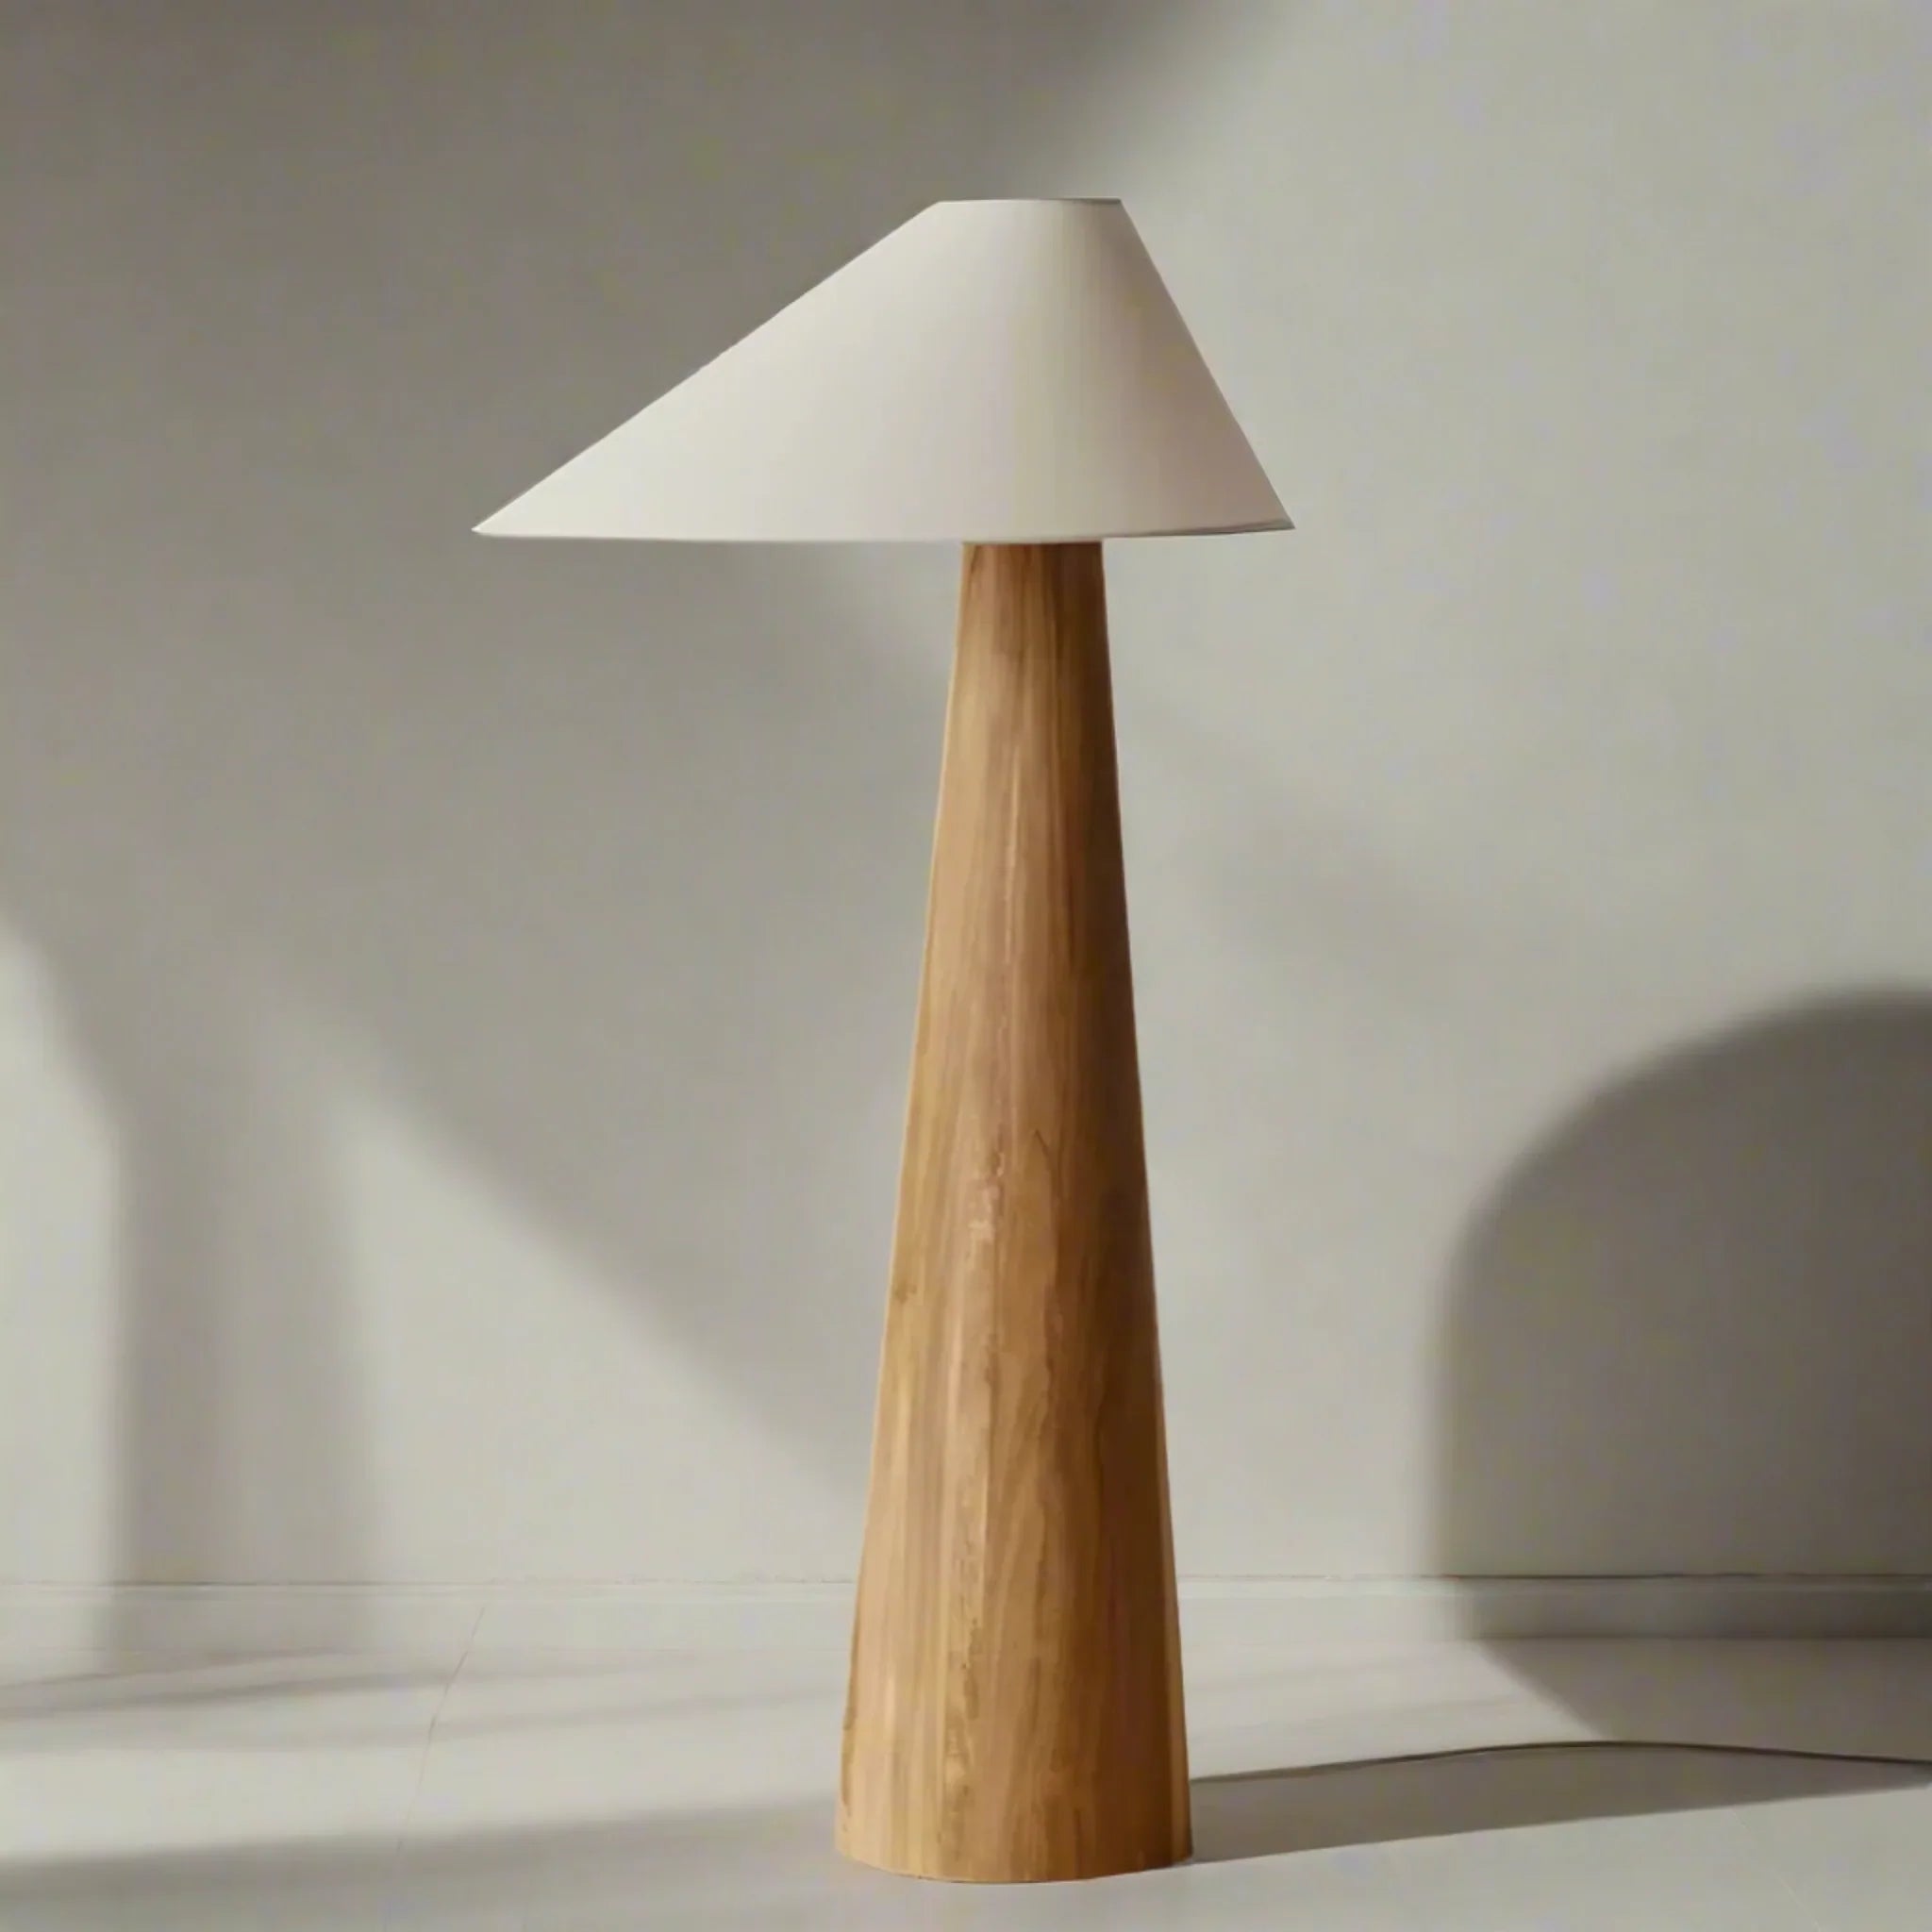
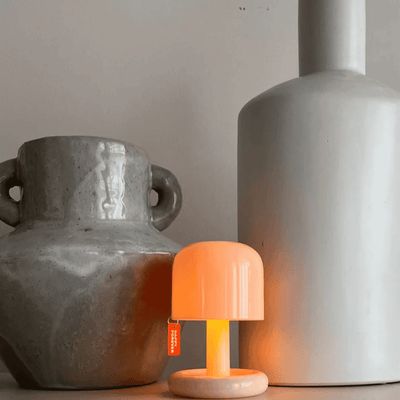
Stille Japanese Wabi-Sabi Solid Wood Floor Lamp
$399.00
$699.00
Add ambient warmth to corners where recessed lighting needs support. This sculptural floor lamp brings organic texture and soft pools of light to Scandinavian living spaces. Learn more ➔

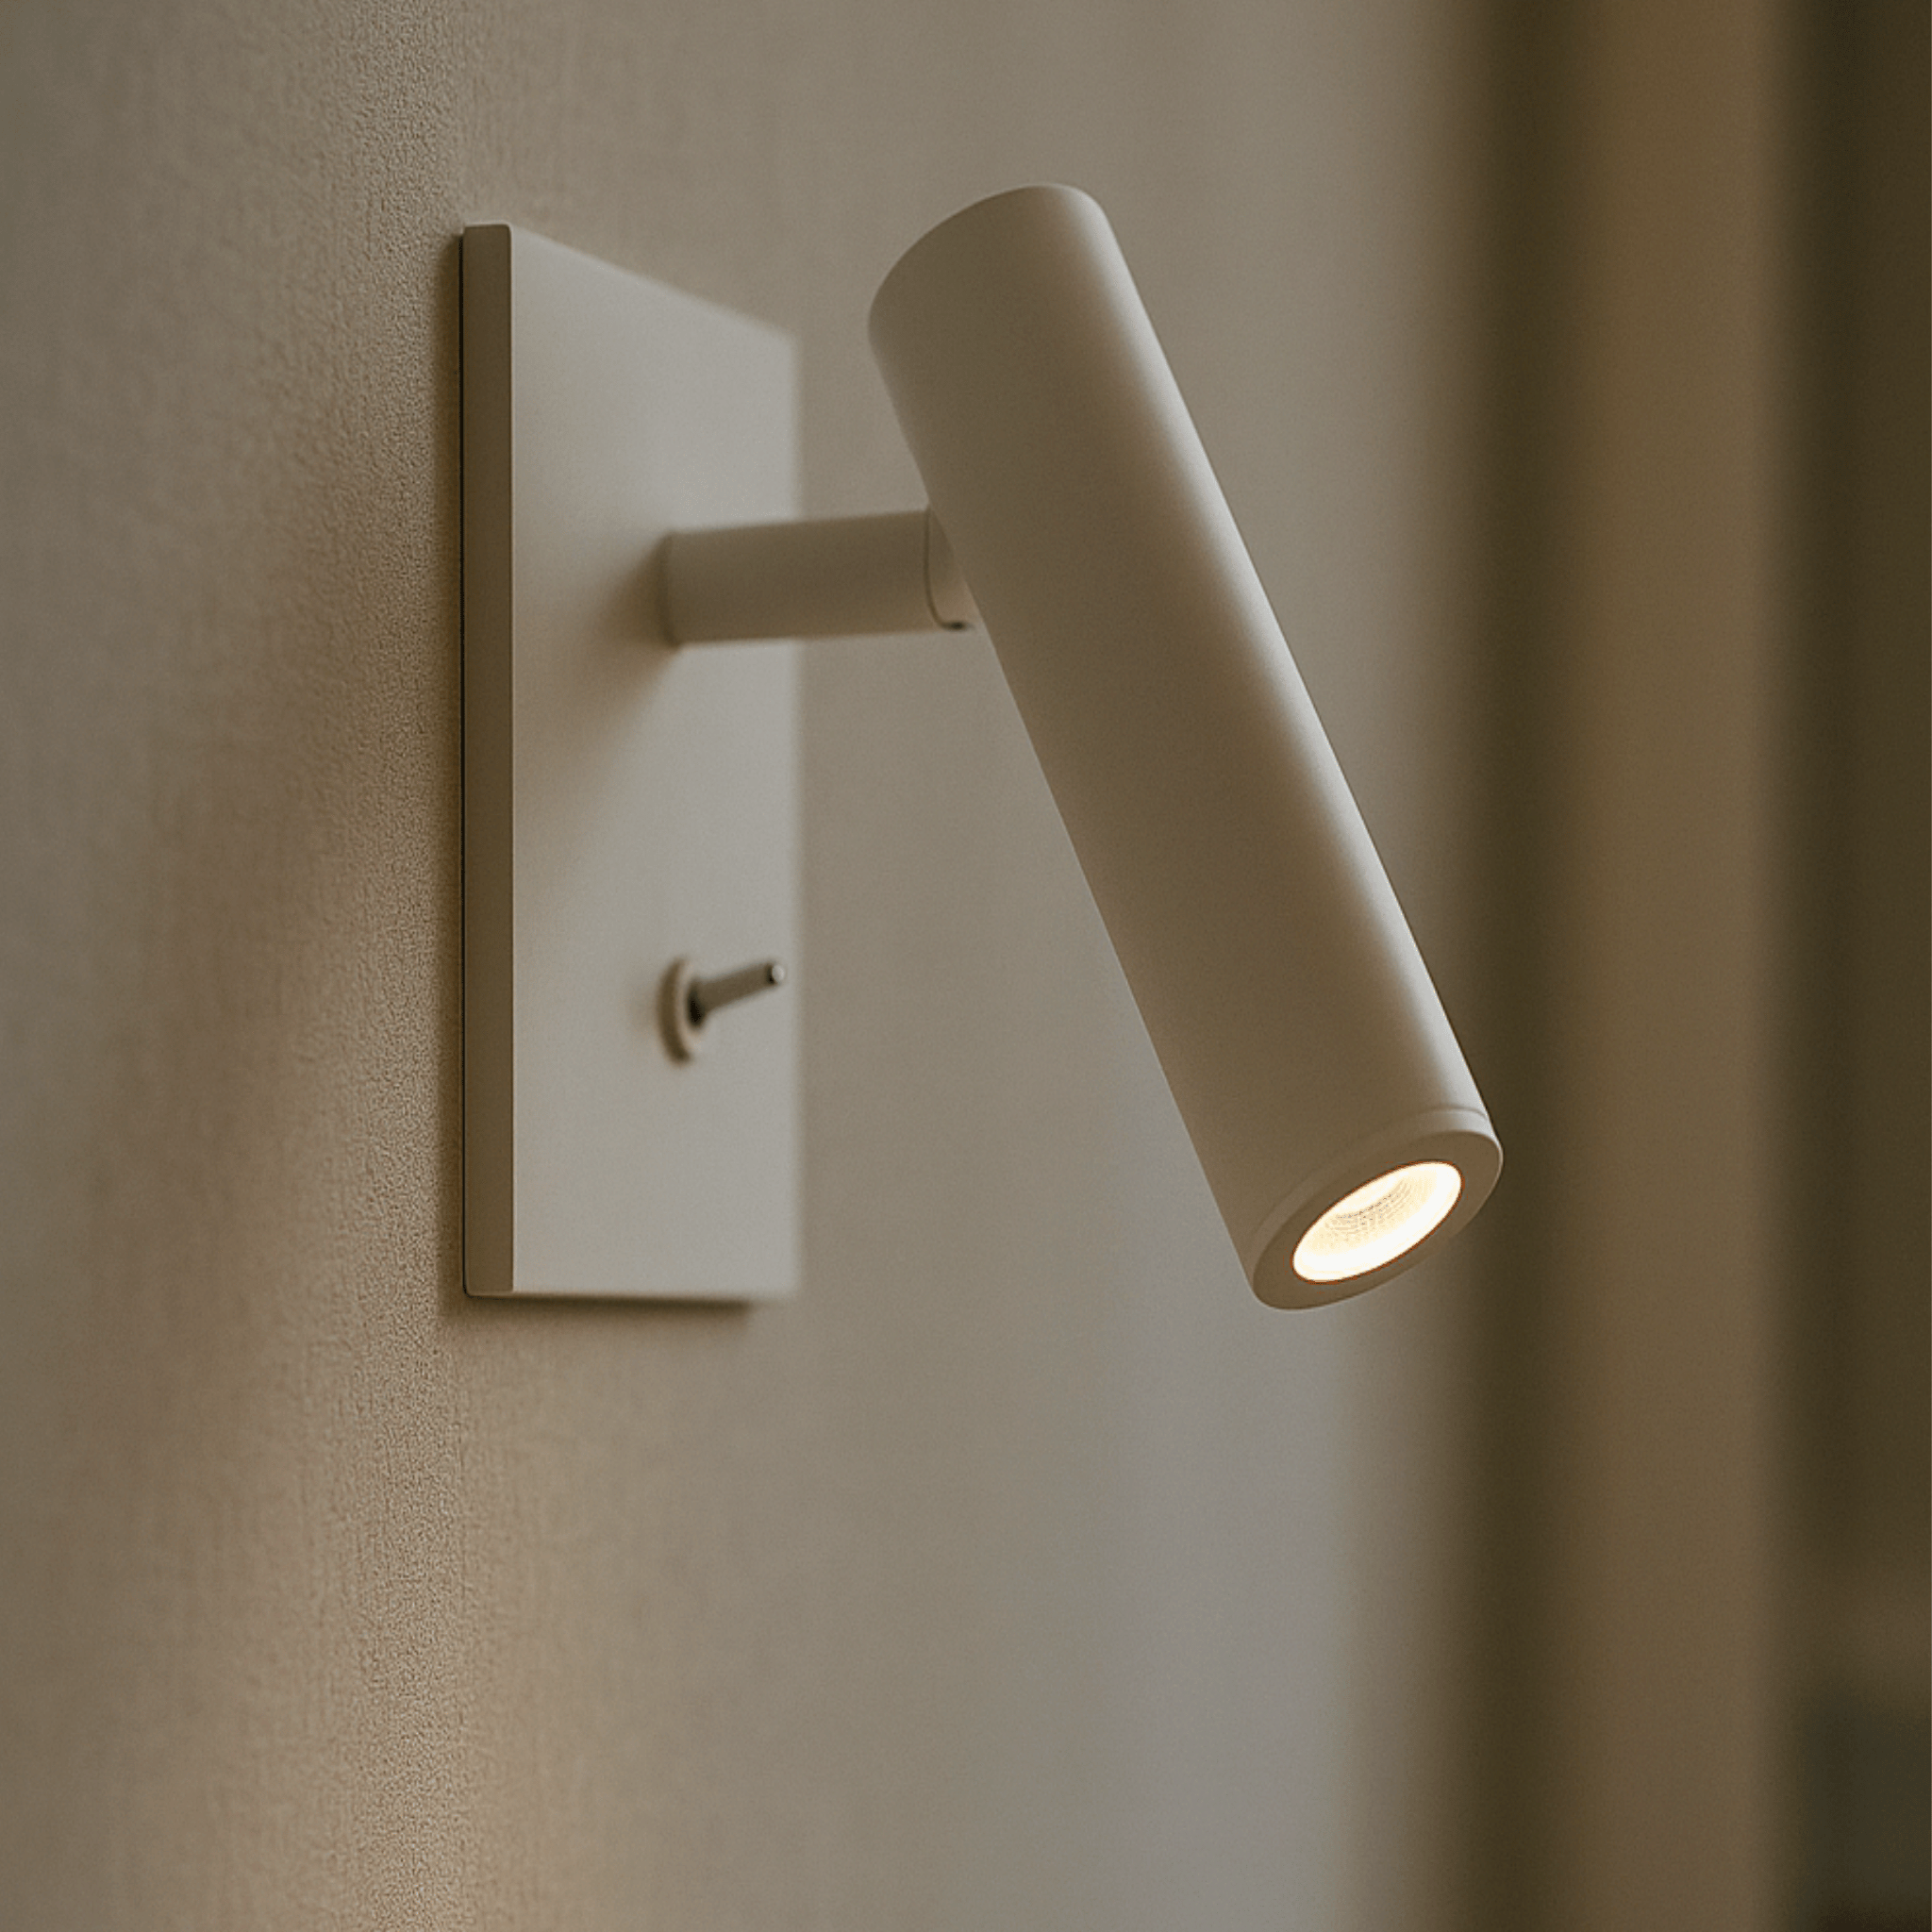
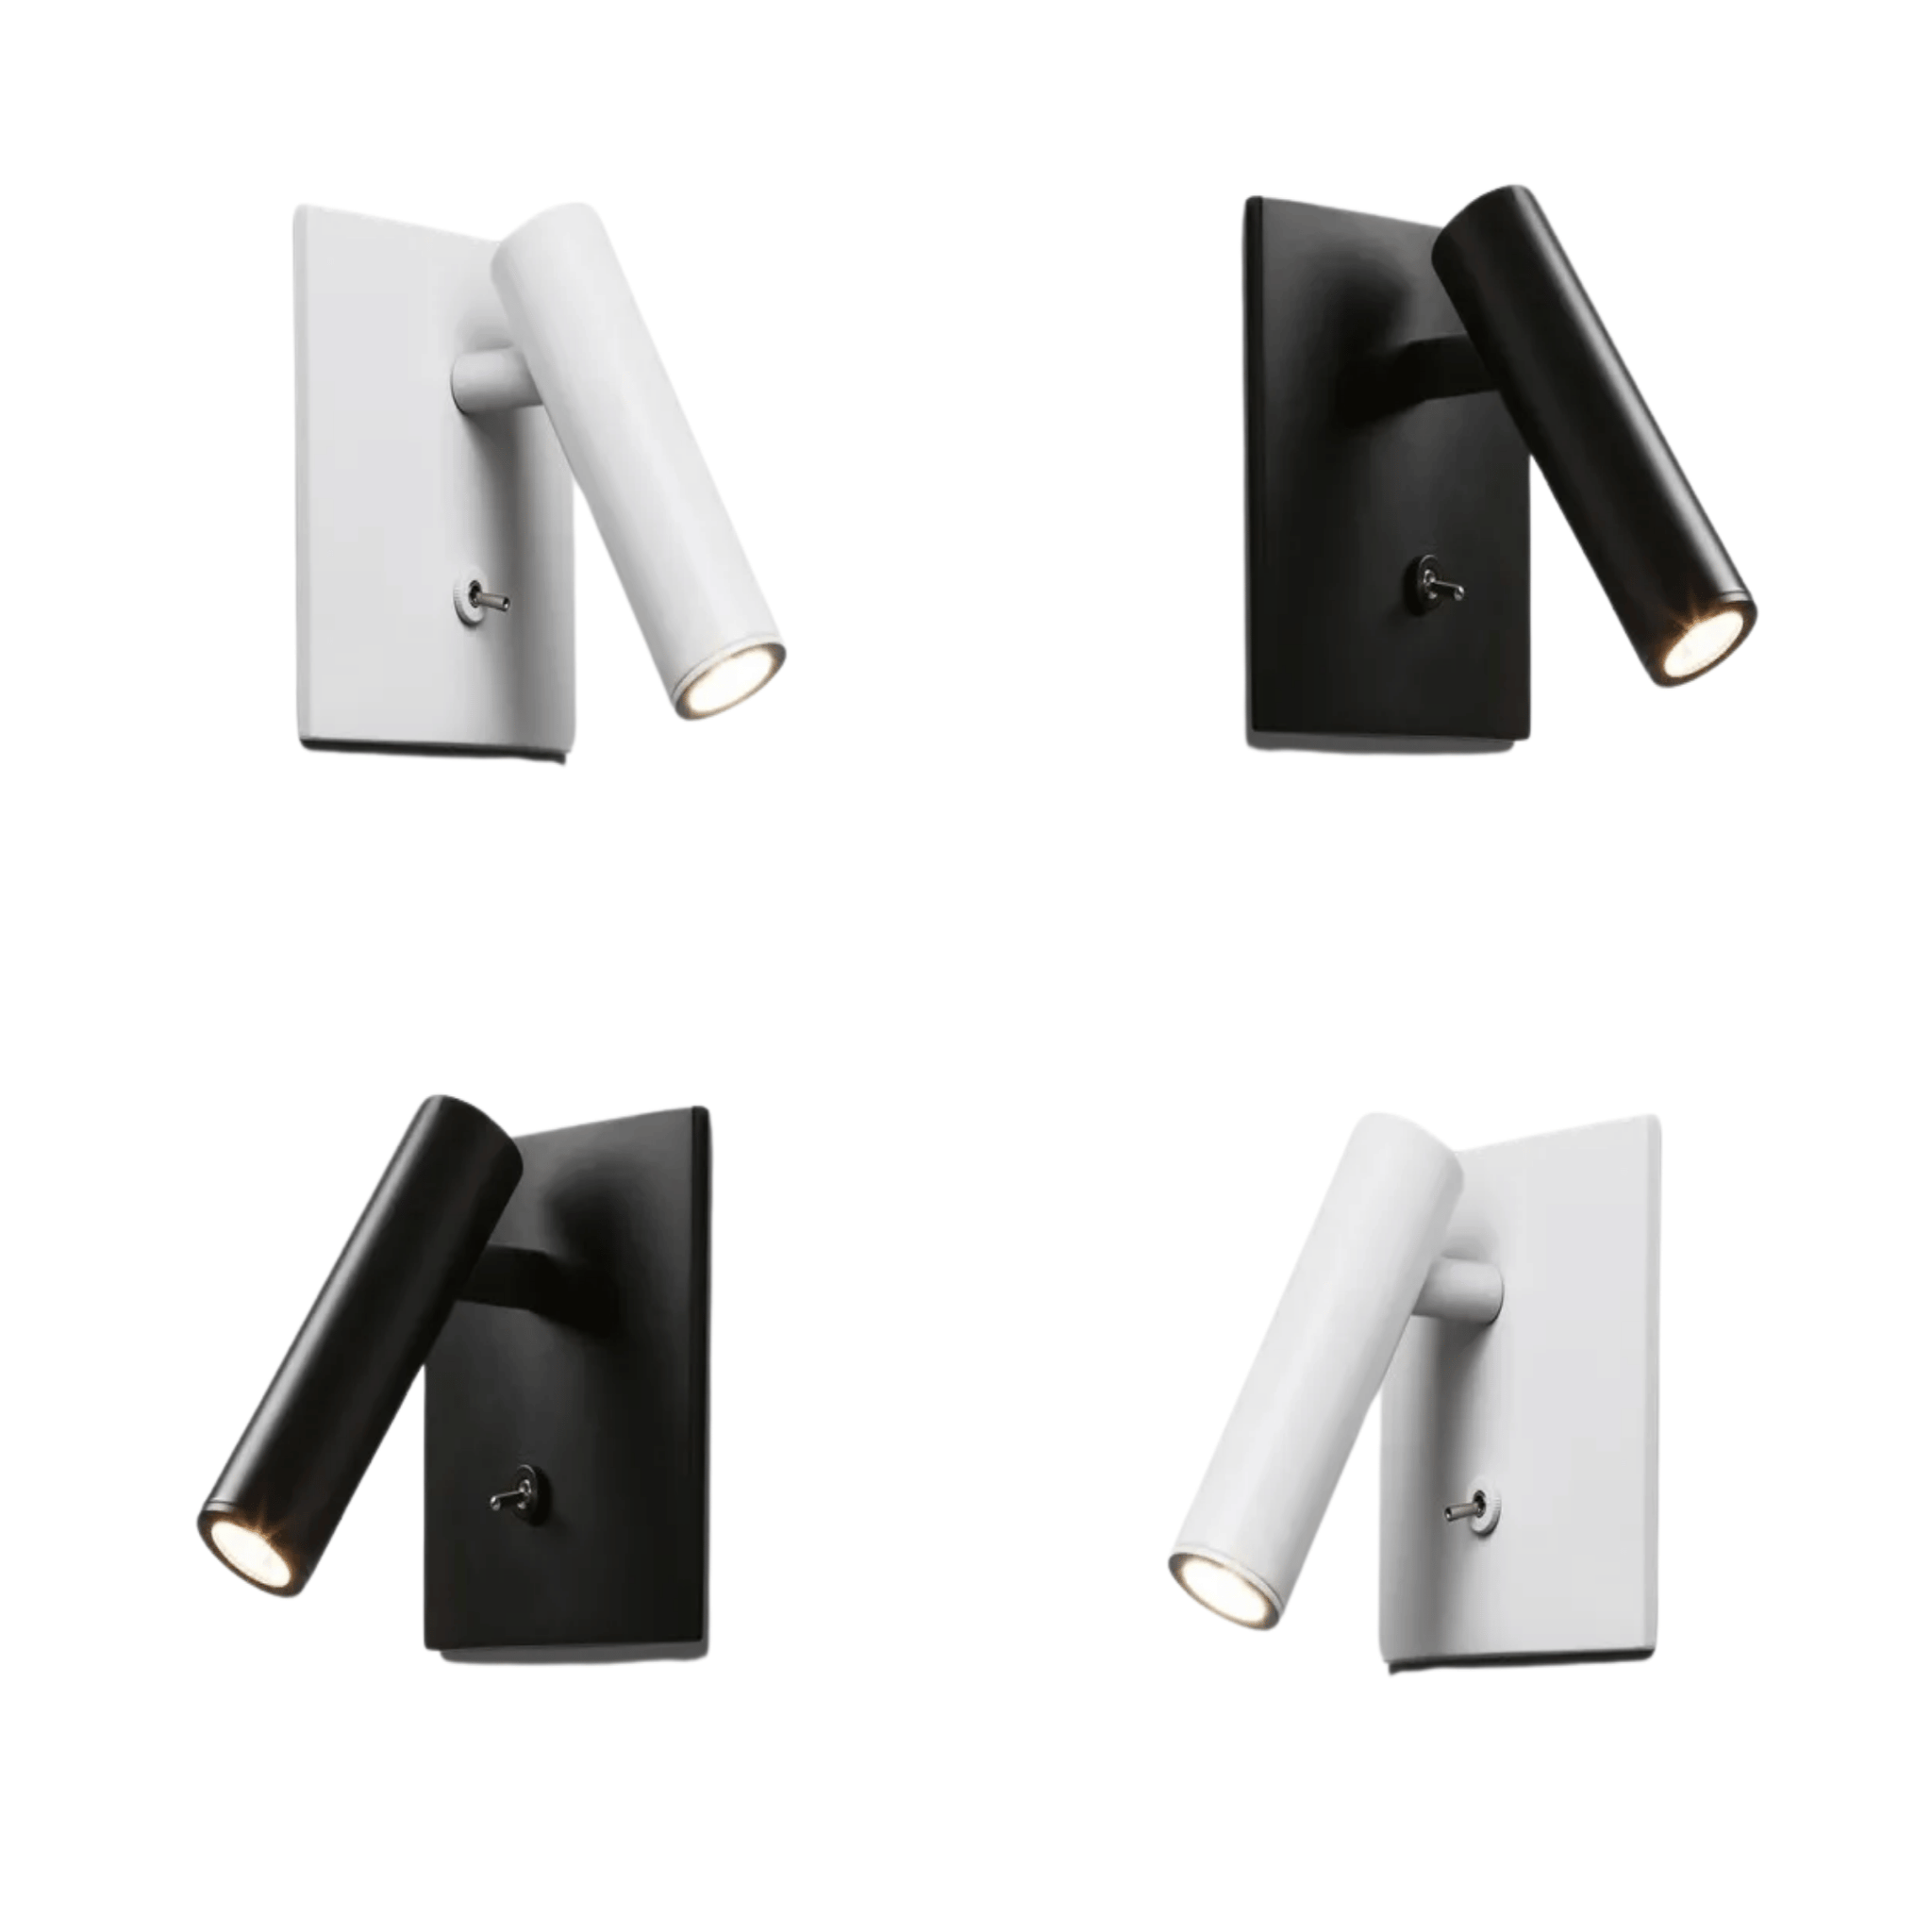
Glödra Square Adjustable Recessed LED Wall Light
$199.00
$289.00
Complete your layered lighting scheme with this adjustable recessed wall sconce. Perfect for accent lighting that works beautifully alongside ceiling can lights. Learn more ➔
Notice how the properly planned recessed lighting creates an even wash of ambient illumination, while additional fixtures provide the accent and task layers that make the space truly livable:

The Latest Trends in Recessed Lighting
The world of recessed lighting continues to evolve, with several trends particularly relevant to Scandinavian-inspired interiors:
Trimless Recessed Lights
For the ultimate minimalist aesthetic, trimless fixtures install flush with your ceiling, creating the illusion that light emanates directly from the plaster. This approach requires more precise installation but delivers unparalleled clean lines that disappear completely into architectural surfaces.
Smart Lighting Integration
Modern recessed systems increasingly integrate with smart home platforms, allowing you to adjust brightness, color temperature, and even create lighting scenes from your phone or voice commands. Imagine a "Movie Night" scene that dims your can lights to 20% while bringing your accent lamps to full warm glow, or a "Morning Coffee" setting that gradually brightens to energize your day.
Slim LED Panels
Ultra-thin LED recessed panels require minimal ceiling depth, making them ideal for retrofit installations where traditional can housings won't fit. They provide broad, even illumination without the visible bulb spot of traditional recessed fixtures.
Layered Dimming Control
Rather than dimming all recessed lights together, consider dividing your room into multiple zones controlled separately. This allows you to brighten task areas while keeping ambient zones subdued—perfect for modern living rooms that serve multiple functions throughout the day.


Common Mistakes to Avoid
Even with the spacing formula in hand, homeowners often make these preventable errors:
- Insufficient quantity: Fewer, brighter lights rarely look as good as more, dimmer lights. When in doubt, add an extra fixture rather than relying on high-wattage bulbs.
- Inconsistent spacing: Uneven placement destroys the clean aesthetic recessed lighting promises. Measure carefully and mark positions before cutting.
- Ignoring dimmers: Every recessed light should be dimmable. Full brightness is rarely needed, and dimming extends bulb life while creating atmosphere.
- Wrong placement over work areas: Lights positioned directly above seating can create harsh shadows on faces. Offset slightly or use wall sconces to cross-light conversation areas.
- Forgetting about insulation: In ceiling cavities with insulation, always use IC-rated (insulation contact) fixtures to prevent fire hazards.
If you're installing new recessed lighting, consider consulting a licensed electrician to ensure proper wiring and load calculations. While the layout planning is absolutely something you can handle yourself, electrical work is best left to professionals.
Creating Your Complete Lighting Plan
The most successful living room lighting plans begin with recessed lighting as the foundation, then thoughtfully add layers to address the limitations of overhead-only illumination. Start by calculating your spacing using the ceiling-height formula, map your grid or perimeter layout, then identify where additional fixtures—pendants, floor lamps, and wall sconces—will complete the picture.
Remember that Scandinavian design principles emphasize intentionality over excess. You don't need dozens of fixtures; you need the right fixtures in the right places. A well-planned system of recessed lights paired with a few carefully chosen statement pieces will always outperform a cluttered collection of mismatched lamps.
At Skonne, we believe lighting should feel effortless—illuminating your space beautifully while fading into the background of your daily life. Whether you're planning an entirely new recessed lighting layout or seeking the perfect complementary pieces to enhance your existing system, our curated collection offers Scandinavian-inspired solutions designed to bring warmth, functionality, and timeless style to your living room.
Frequently Asked Questions about Living Room Recessed Lighting
Yes, recessed lights are excellent for living rooms when properly planned. They provide clean, ambient illumination that makes spaces feel larger and more open. However, recessed lighting works best as part of a layered system paired with floor lamps, wall sconces, or pendant lights to avoid a flat, clinical look. For Scandinavian-inspired spaces, recessed lights create the perfect foundation of even illumination upon which you can build warmth with complementary fixtures.
For living rooms, choose 4-inch fixtures for standard 8-9 foot ceilings or 6-inch fixtures for higher ceilings and larger spaces. Select warm white LEDs (2700K-3000K) for cozy ambiance, and ensure all fixtures are dimmable. IC-rated housings are essential if your ceiling contains insulation. Fixed trims work well for general ambient lighting, while adjustable eyeball trims provide flexibility for highlighting artwork or architectural features.
The latest trends include trimless fixtures that disappear completely into ceilings for ultimate minimalism, smart lighting integration allowing app and voice control of brightness and color temperature, ultra-slim LED panels for retrofit installations, and multi-zone dimming that allows different areas of a room to be controlled separately. Scandinavian-inspired interiors particularly favor trimless and minimal-profile fixtures that maintain clean sightlines.
Start by calculating spacing using the formula: ceiling height divided by two equals the distance between lights and from walls. Map your room to scale, marking furniture and permanent fixtures. Choose a grid layout for open spaces or perimeter-plus-center for defined seating areas. Select appropriately sized fixtures (4-inch for standard ceilings, 6-inch for higher), ensure they're dimmable and IC-rated if needed, and install dimmer switches. Complete your plan by adding complementary lighting—floor lamps, wall sconces, or pendants—to layer with your recessed foundation.