There's something deeply satisfying about illuminating your home with a light fixture you've installed yourself. The gentle glow of a DIY pendant light cascading over your dining table or kitchen island doesn't just brighten a room—it creates that warm, intentional atmosphere that transforms a house into a sanctuary. Whether you're a renter seeking plug-in solutions or a homeowner ready to hardwire your first fixture, this comprehensive guide will walk you through everything you need to know about pendant light installation, from basic wiring to creative DIY shade ideas.
At Skonne, we believe that beautiful lighting should be accessible to everyone. That's why we've curated a collection of Scandinavian-inspired pendant lights designed with straightforward installation in mind—because achieving that perfect hygge ambiance shouldn't require an electrician's license. By the end of this guide, you'll have the confidence to select, install, and even customize your own pendant lighting.
What You Need to Know Before Starting Your DIY Pendant Light Project
Before you climb that ladder, it's essential to understand the fundamentals of pendant light installation. A successful DIY pendant light project requires three key elements: the right fixture, proper tools, and a clear understanding of your space's electrical setup.
First, assess your current situation. Do you have an existing junction box in the ceiling, or are you working with a blank canvas? This distinction determines whether you'll need a hardwired installation or if a plug-in pendant light would better suit your needs. For renters or those uncomfortable with electrical work, plug-in options offer the Scandinavian aesthetic without permanent modifications.
Your choice of pendant light kit matters significantly. Quality hardware ensures safety and longevity. When browsing options, look for fixtures with UL certification and clear installation instructions. For those drawn to the clean lines and organic materials of Nordic design, our Glass Pendant Lights collection offers pieces that balance stunning aesthetics with beginner-friendly installation.

How to Install a Pendant Light: The Complete Process
Installing a pendant light might seem daunting, but breaking it down into manageable steps makes the process approachable for any DIY enthusiast. Whether you're replacing an outdated fixture or adding new lighting to your space, following proper technique ensures both safety and stunning results.
Begin by turning off the power at the circuit breaker—not just the wall switch. Use a voltage tester to confirm the wires are dead before touching them. This non-negotiable step protects you from electrical shock and gives you confidence as you work.
Next, remove your existing fixture if applicable. Take a photo of the current wiring configuration before disconnecting anything; this visual reference proves invaluable during reassembly. Most residential ceiling boxes use a standard mounting bracket, but verify that yours can support the weight of your new pendant. Heavier fixtures like glass pendants may require additional support.
Once you've prepared the mounting bracket according to the manufacturer's instructions, it's time to address the wiring. This is where many beginners feel uncertain, but modern pendant light kits are designed with simplicity in mind.


How to Wire a Pendant Light Safely
Understanding basic electrical connections opens up endless possibilities for customizing your lighting. When you wire a pendant light, you're typically working with three wires: black (hot), white (neutral), and bare copper or green (ground). The principle is straightforward—match colors and secure connections.
Strip about three-quarters of an inch of insulation from each wire end using wire strippers. Twist the exposed copper strands together clockwise to prevent fraying. Connect the black wire from your ceiling to the black wire from the fixture, secure with a wire nut, and wrap with electrical tape for extra safety. Repeat this process for the white wires, then connect the ground wires.

After making all connections, carefully tuck the wires into the junction box and attach the fixture's canopy to the mounting bracket. Restore power and test your work. If the light doesn't illuminate, turn the power off again and check your connections—loose wire nuts are the most common culprit.
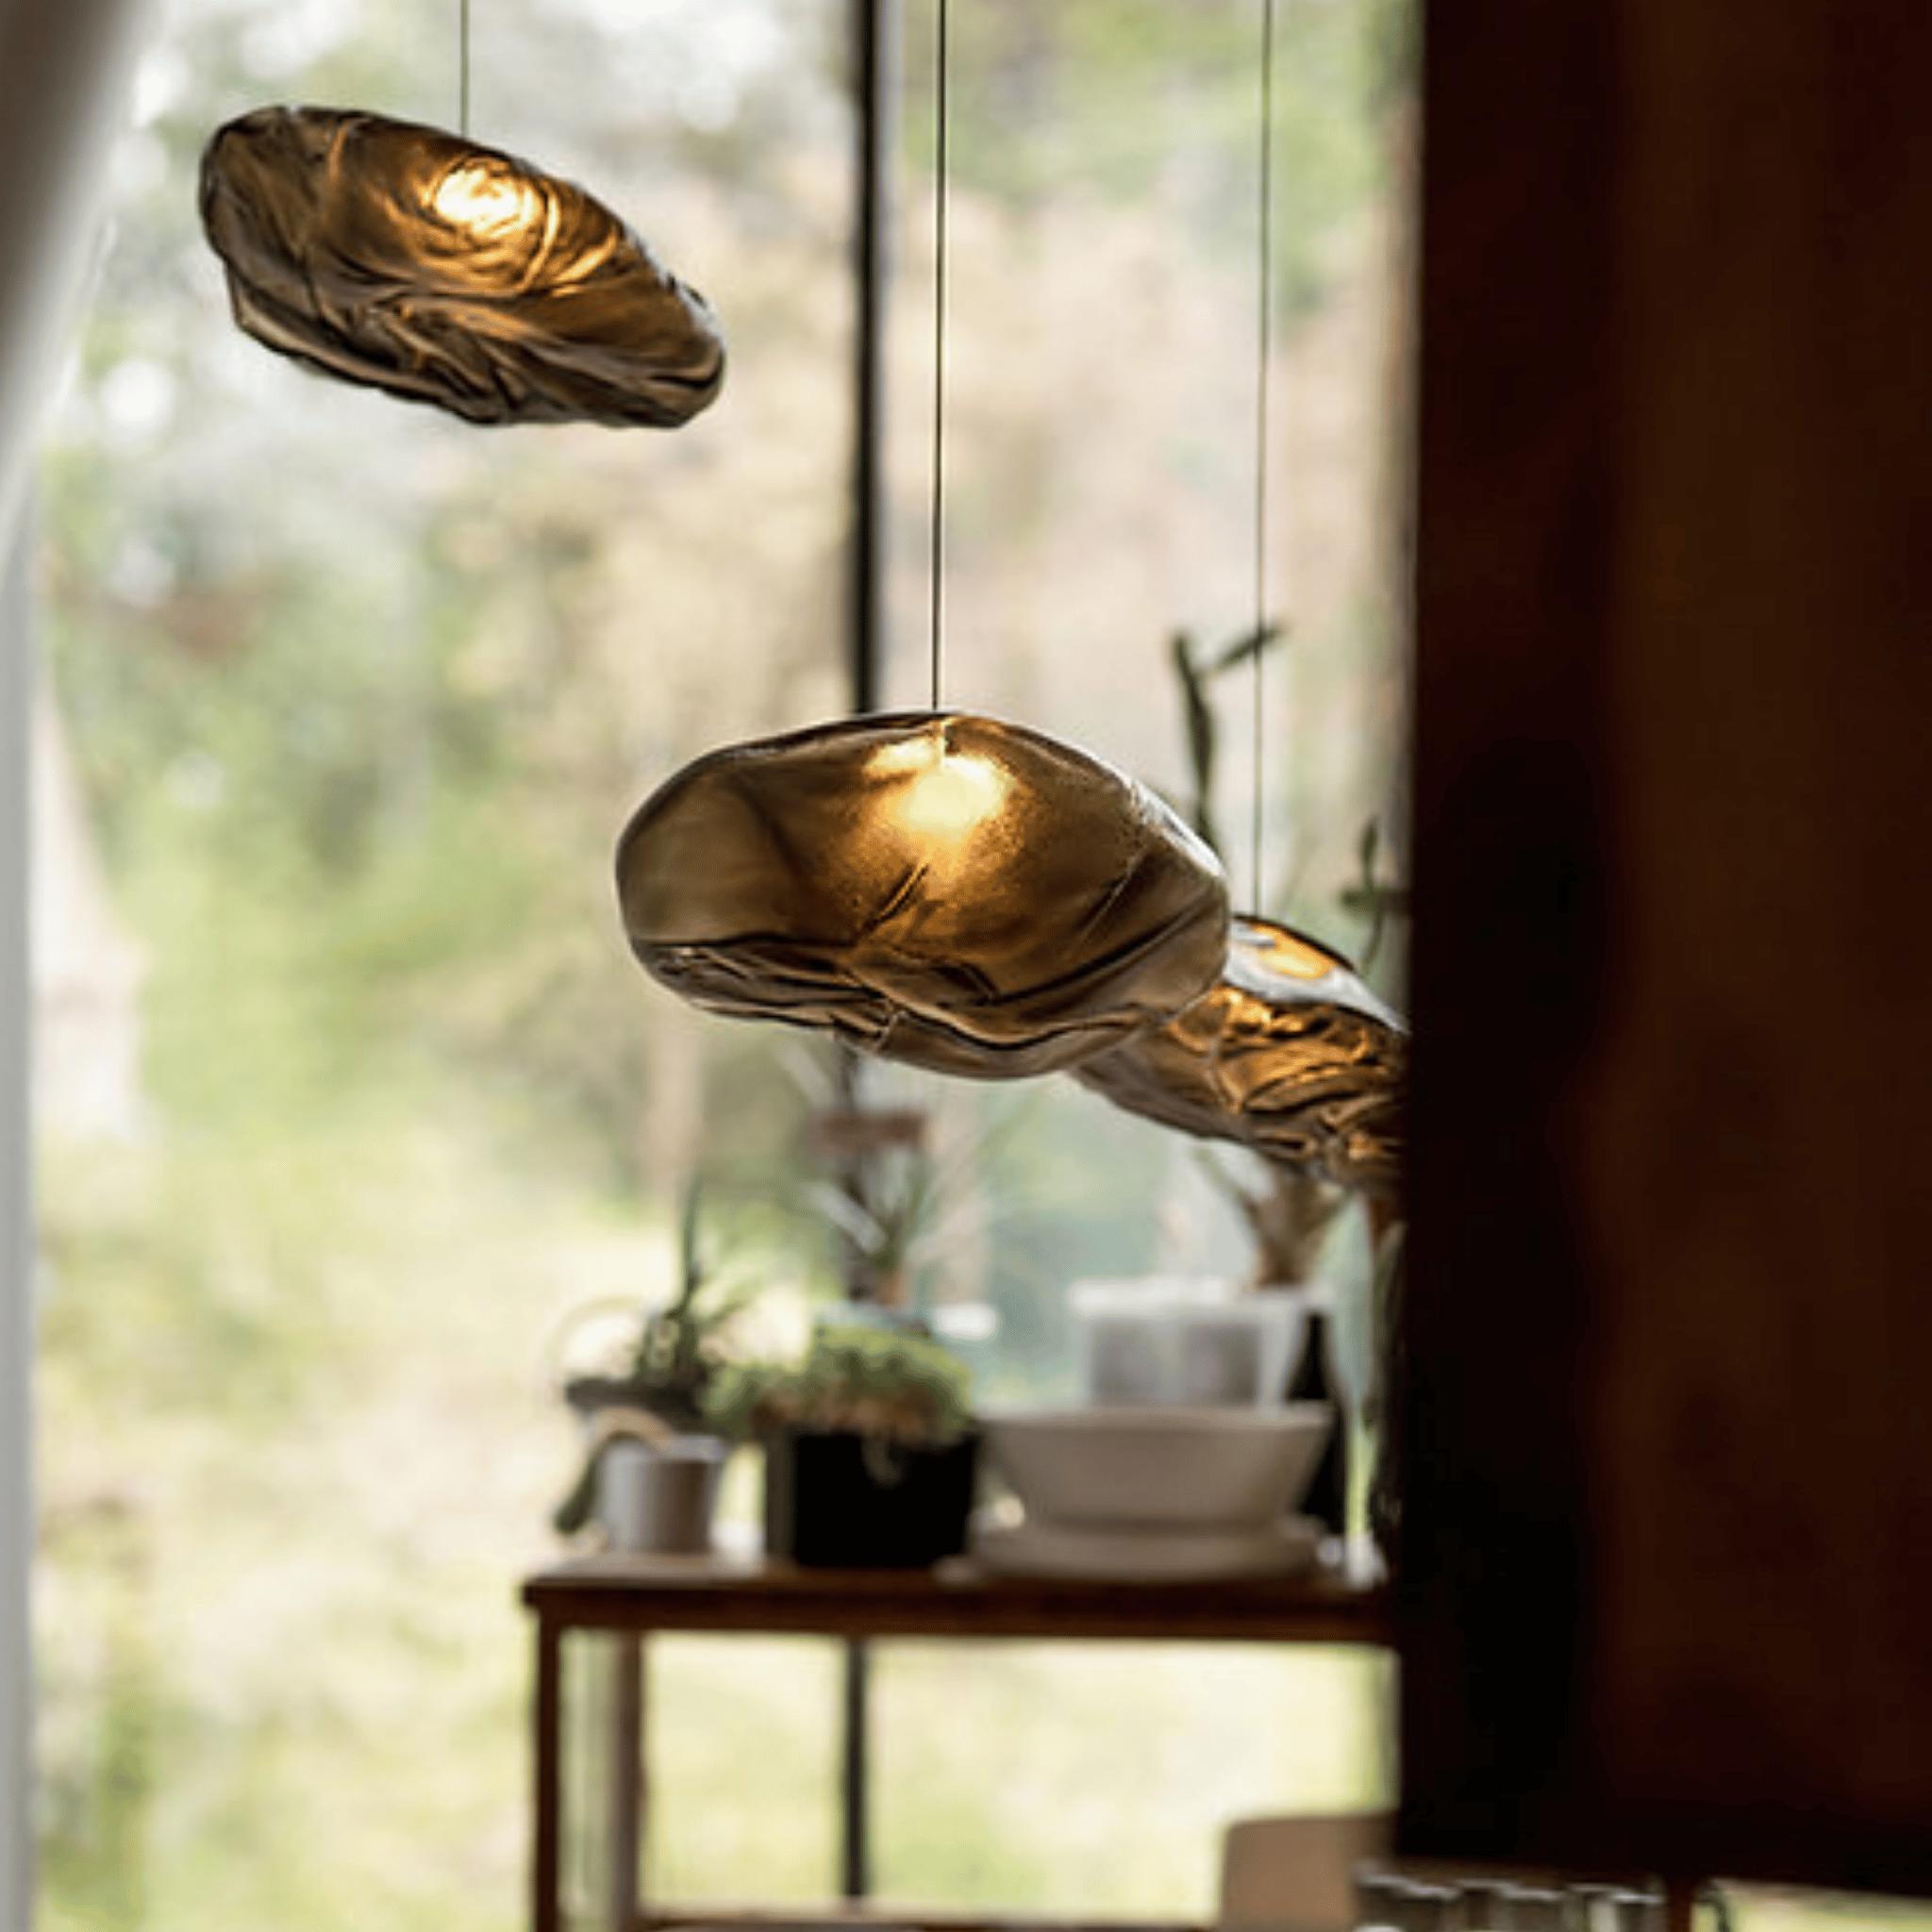
For those seeking a statement piece that rewards careful installation, the Driva Sculptural Cloud Pendant Light in Glass exemplifies how proper wiring technique showcases artisan craftsmanship. This handcrafted cloud glass pendant with its organic silhouette becomes a floating sculpture when properly suspended, available in smoky gray, clear, or amber finishes that catch and diffuse light beautifully.

Driva Sculptural Cloud Pendant Light in Glass
$199.00 $289.00
Handcrafted cloud glass pendant with organic silhouette. Available in smoky gray, clear, or amber finishes from $199. Perfect for DIY installation over dining tables or kitchen islands.
Explore ProductDIY Pendant Light Ideas and Creative Alternatives
Not every pendant light project requires hardwiring. The world of DIY pendant light kits has expanded dramatically, offering solutions for every skill level and living situation. Swag hooks, plug-in conversion kits, and battery-operated options mean you can achieve professional-looking results without touching your home's electrical system.
For the creatively inclined, making your own pendant shade adds a deeply personal touch to your lighting. Consider these approachable DIY approaches:
- Woven basket pendants: Natural materials like rattan or seagrass create warm, diffused light perfect for bedrooms
- Glass jar clusters: Vintage mason jars suspended at varying heights offer rustic charm over kitchen islands
- Fabric drum shades: Simple cylinders wrapped in linen or textured fabric provide soft, ambient illumination
- Geometric wire frames: Modern metal frameworks let Edison bulbs shine as sculptural elements
The key to successful DIY pendant shades lies in scale and material safety. Ensure any flammable materials maintain proper distance from the bulb, and always use LED bulbs which generate less heat than incandescent alternatives.
Pendant Light Height Rules and Placement Guidelines
Understanding the rule for pendant lights regarding placement ensures your DIY efforts result in both beauty and functionality. Generally, pendant lights should hang 30 to 36 inches above a dining table or kitchen island surface. This height provides adequate task lighting while maintaining clear sightlines across the space.
For rooms with standard 8-foot ceilings, this typically means the bottom of your pendant sits approximately 60 inches from the floor. Adjust accordingly for higher ceilings—add three inches of hanging length for every additional foot of ceiling height. Over bedside tables, pendants should hang lower, around 18 to 24 inches above the nightstand surface, creating intimate reading light.
Pro Tip: When installing multiple pendants over a kitchen island, space them evenly—typically 24 to 30 inches apart—to create balanced illumination and visual rhythm.
Width matters too. A pendant light should be approximately one-third the width of the surface it illuminates. For a 6-foot dining table, look for fixtures between 20 and 24 inches in diameter. Smaller pendants work beautifully in multiples, while larger statement pieces command attention as solo installations.

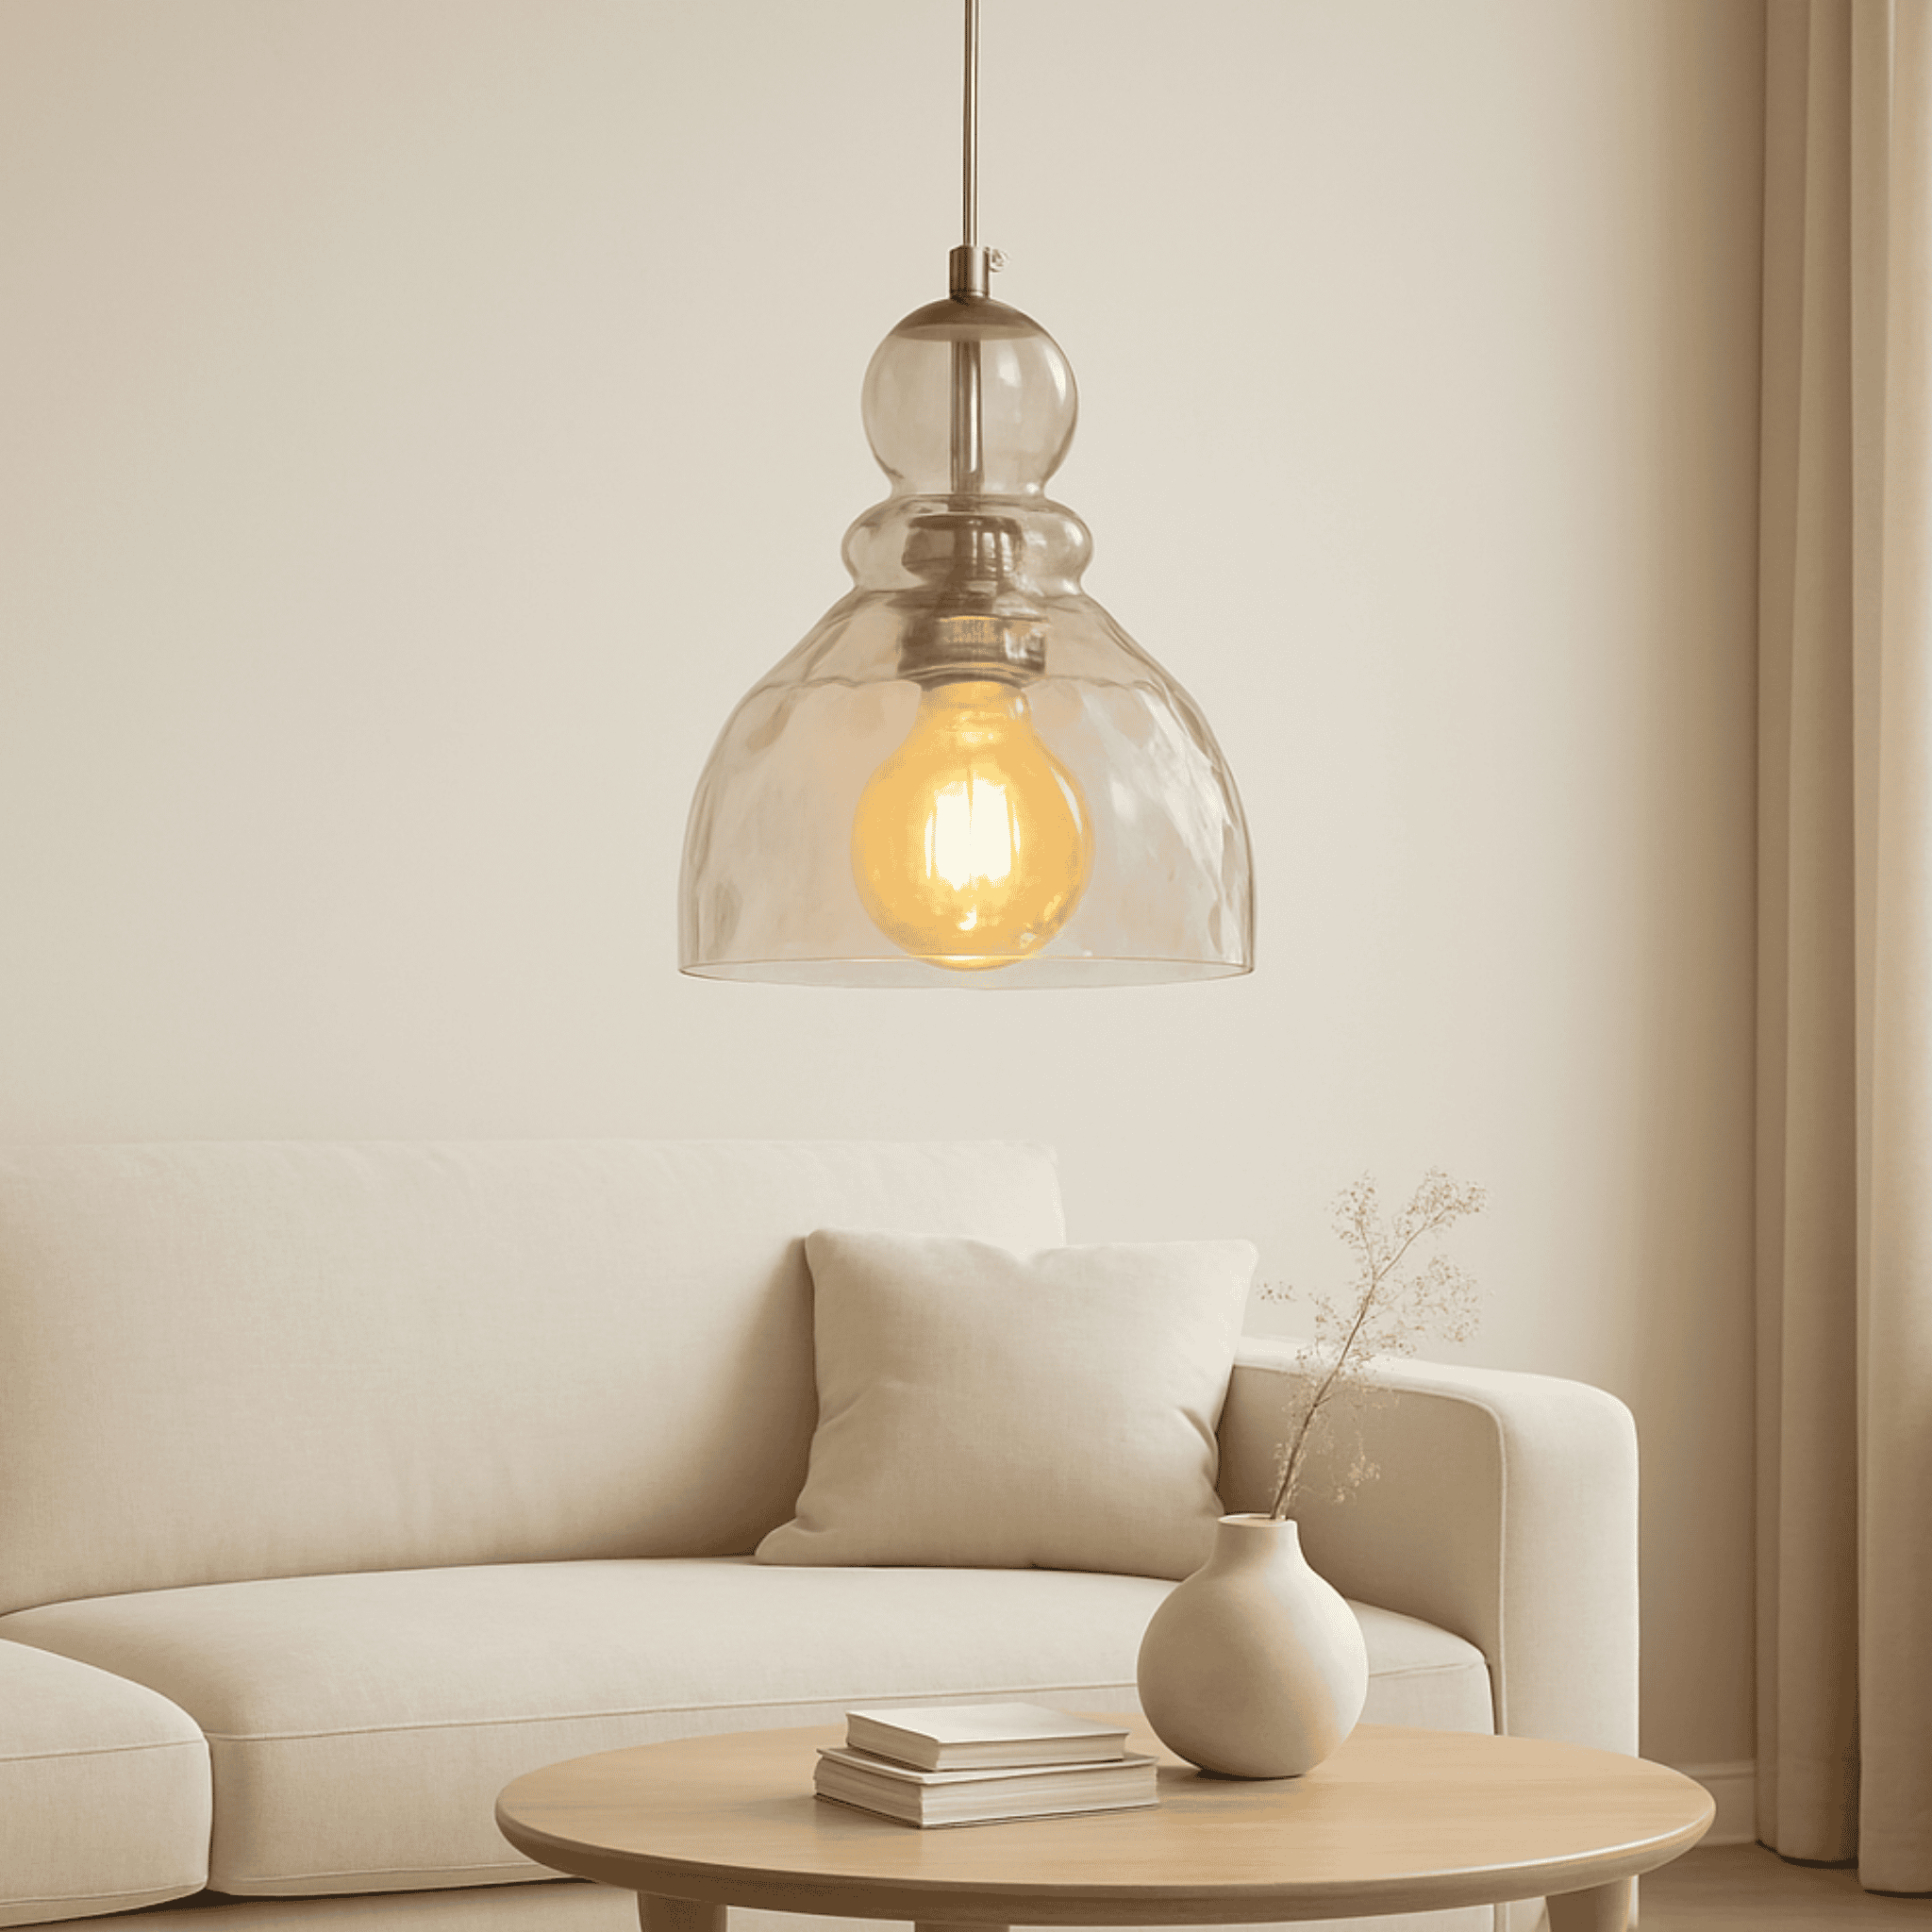
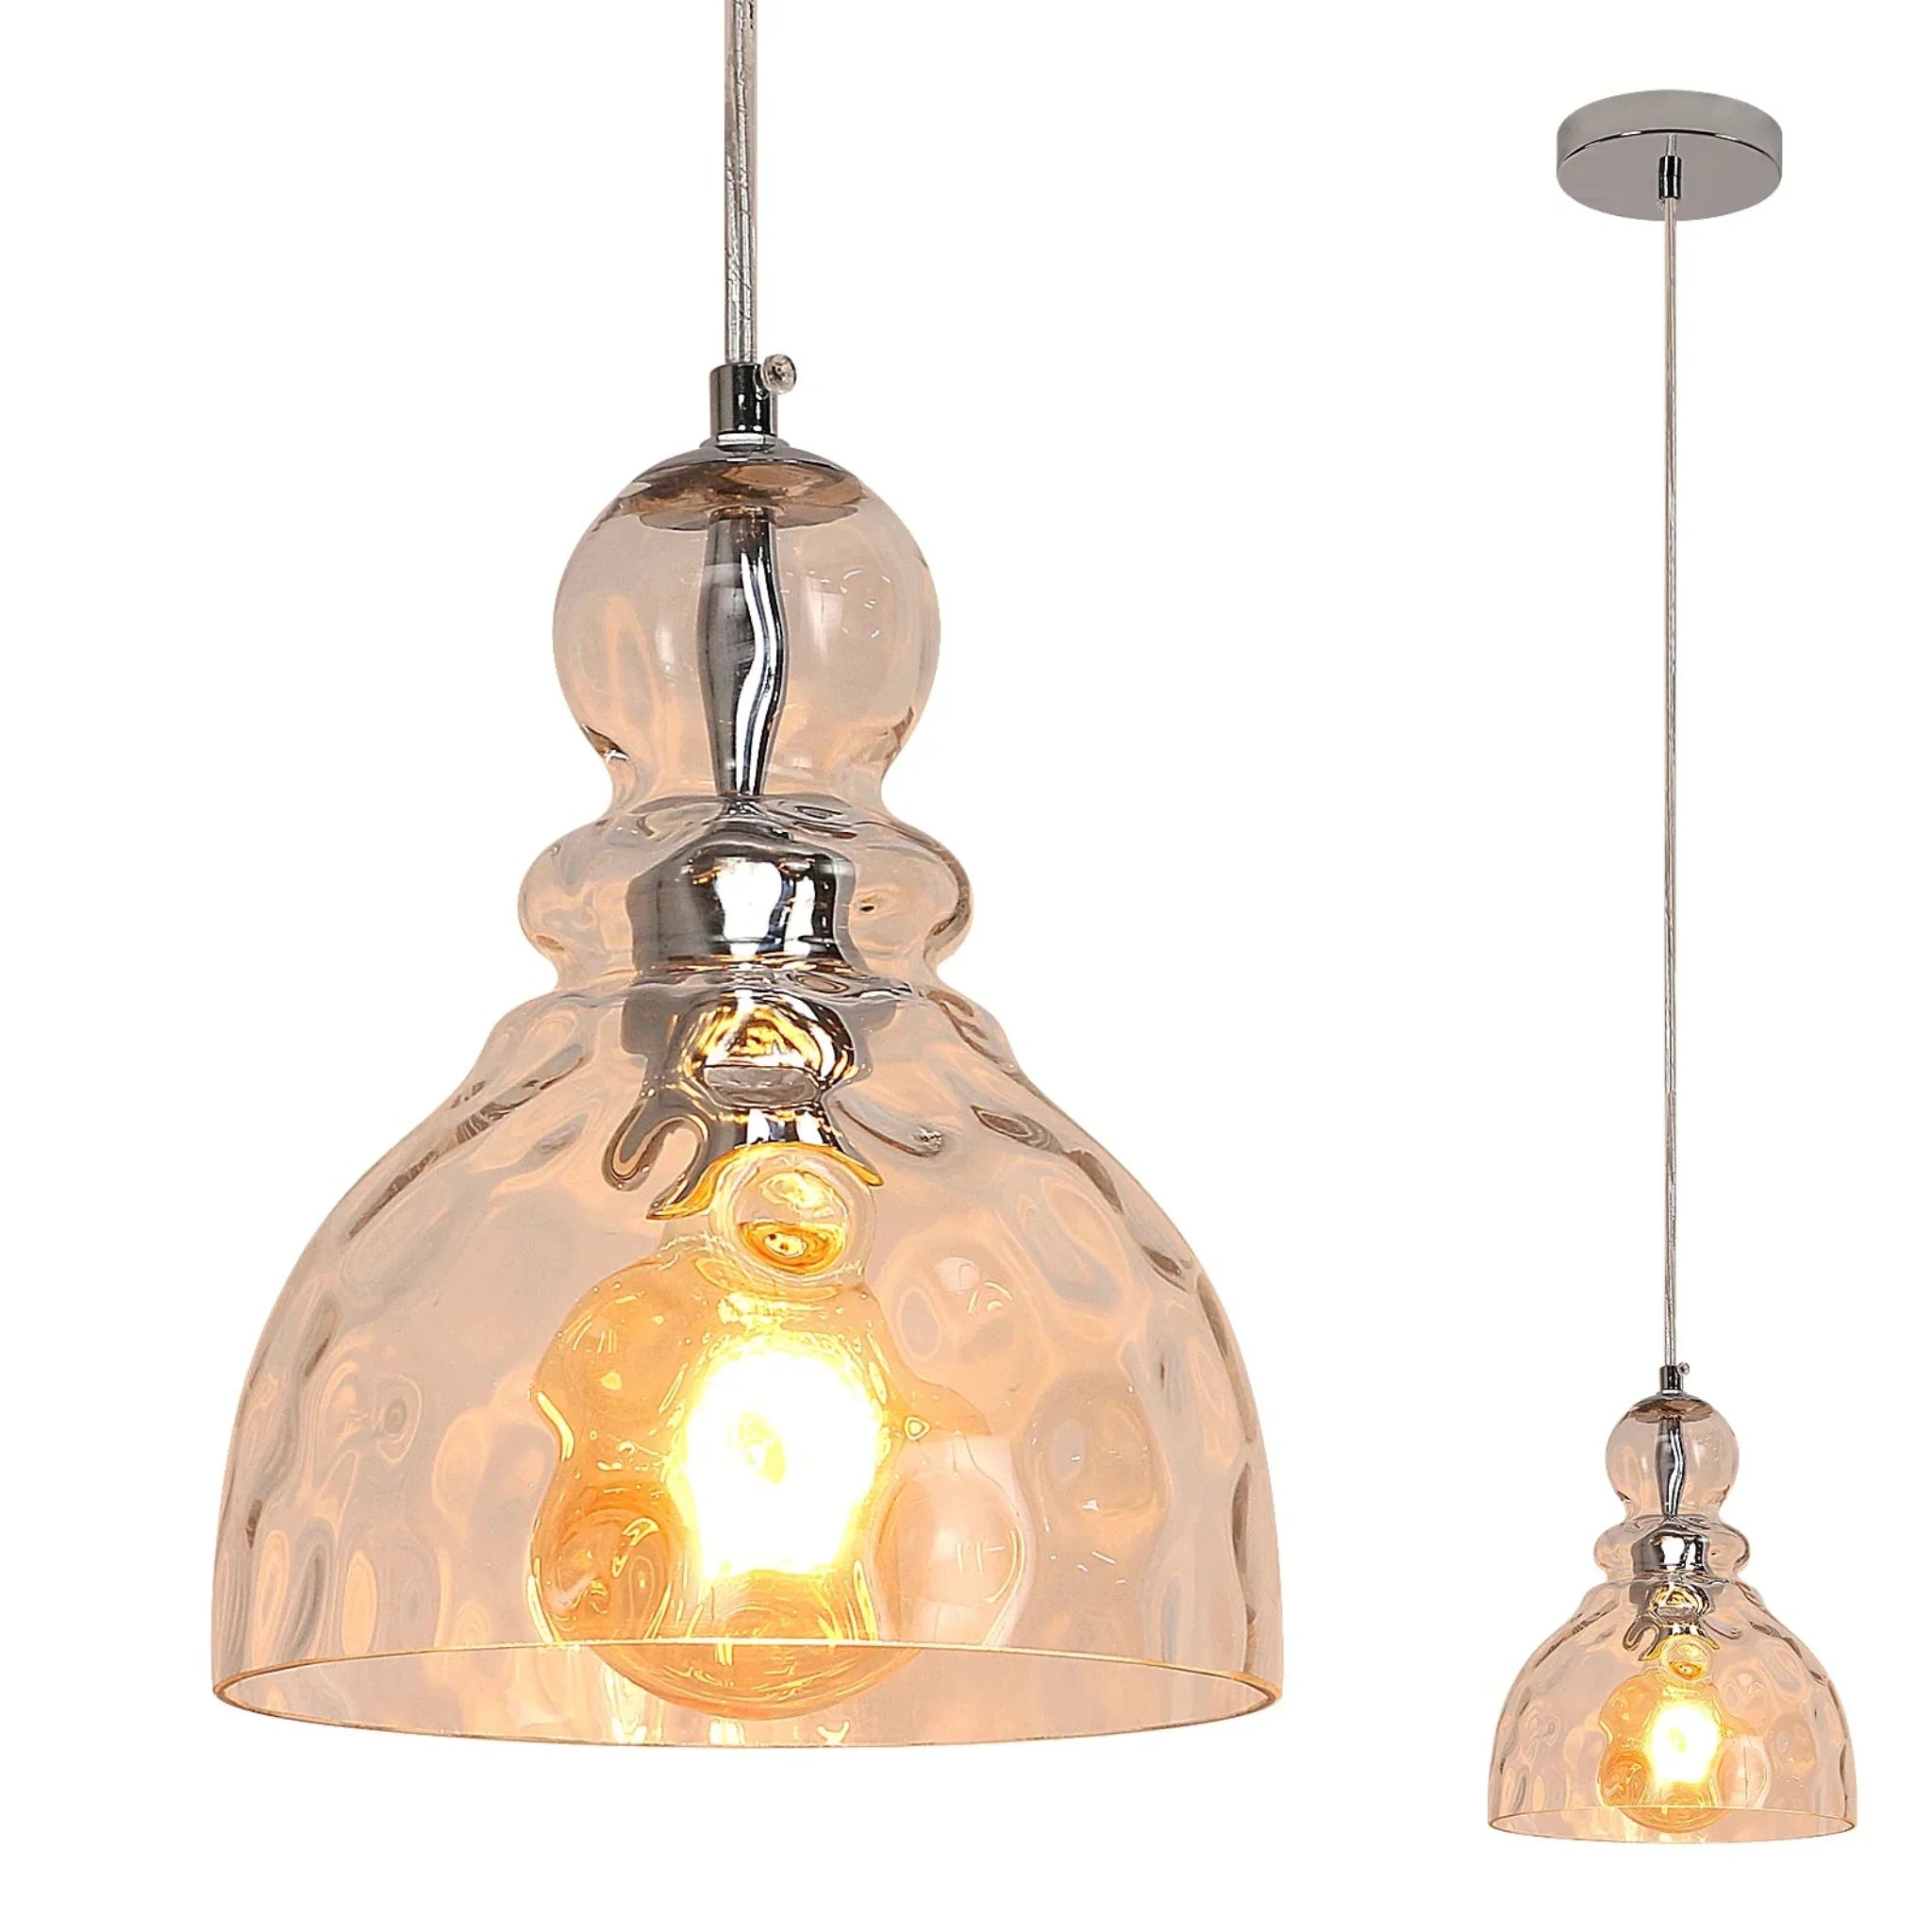
For those beginning their DIY lighting journey, the Dropa Glass Drop Pendant Light offers an ideal starting point. Its affordable price point and simple E26 base installation make it perfect for DIY beginners, while the adjustable 59-inch cord allows you to dial in the perfect hanging height for your specific space.
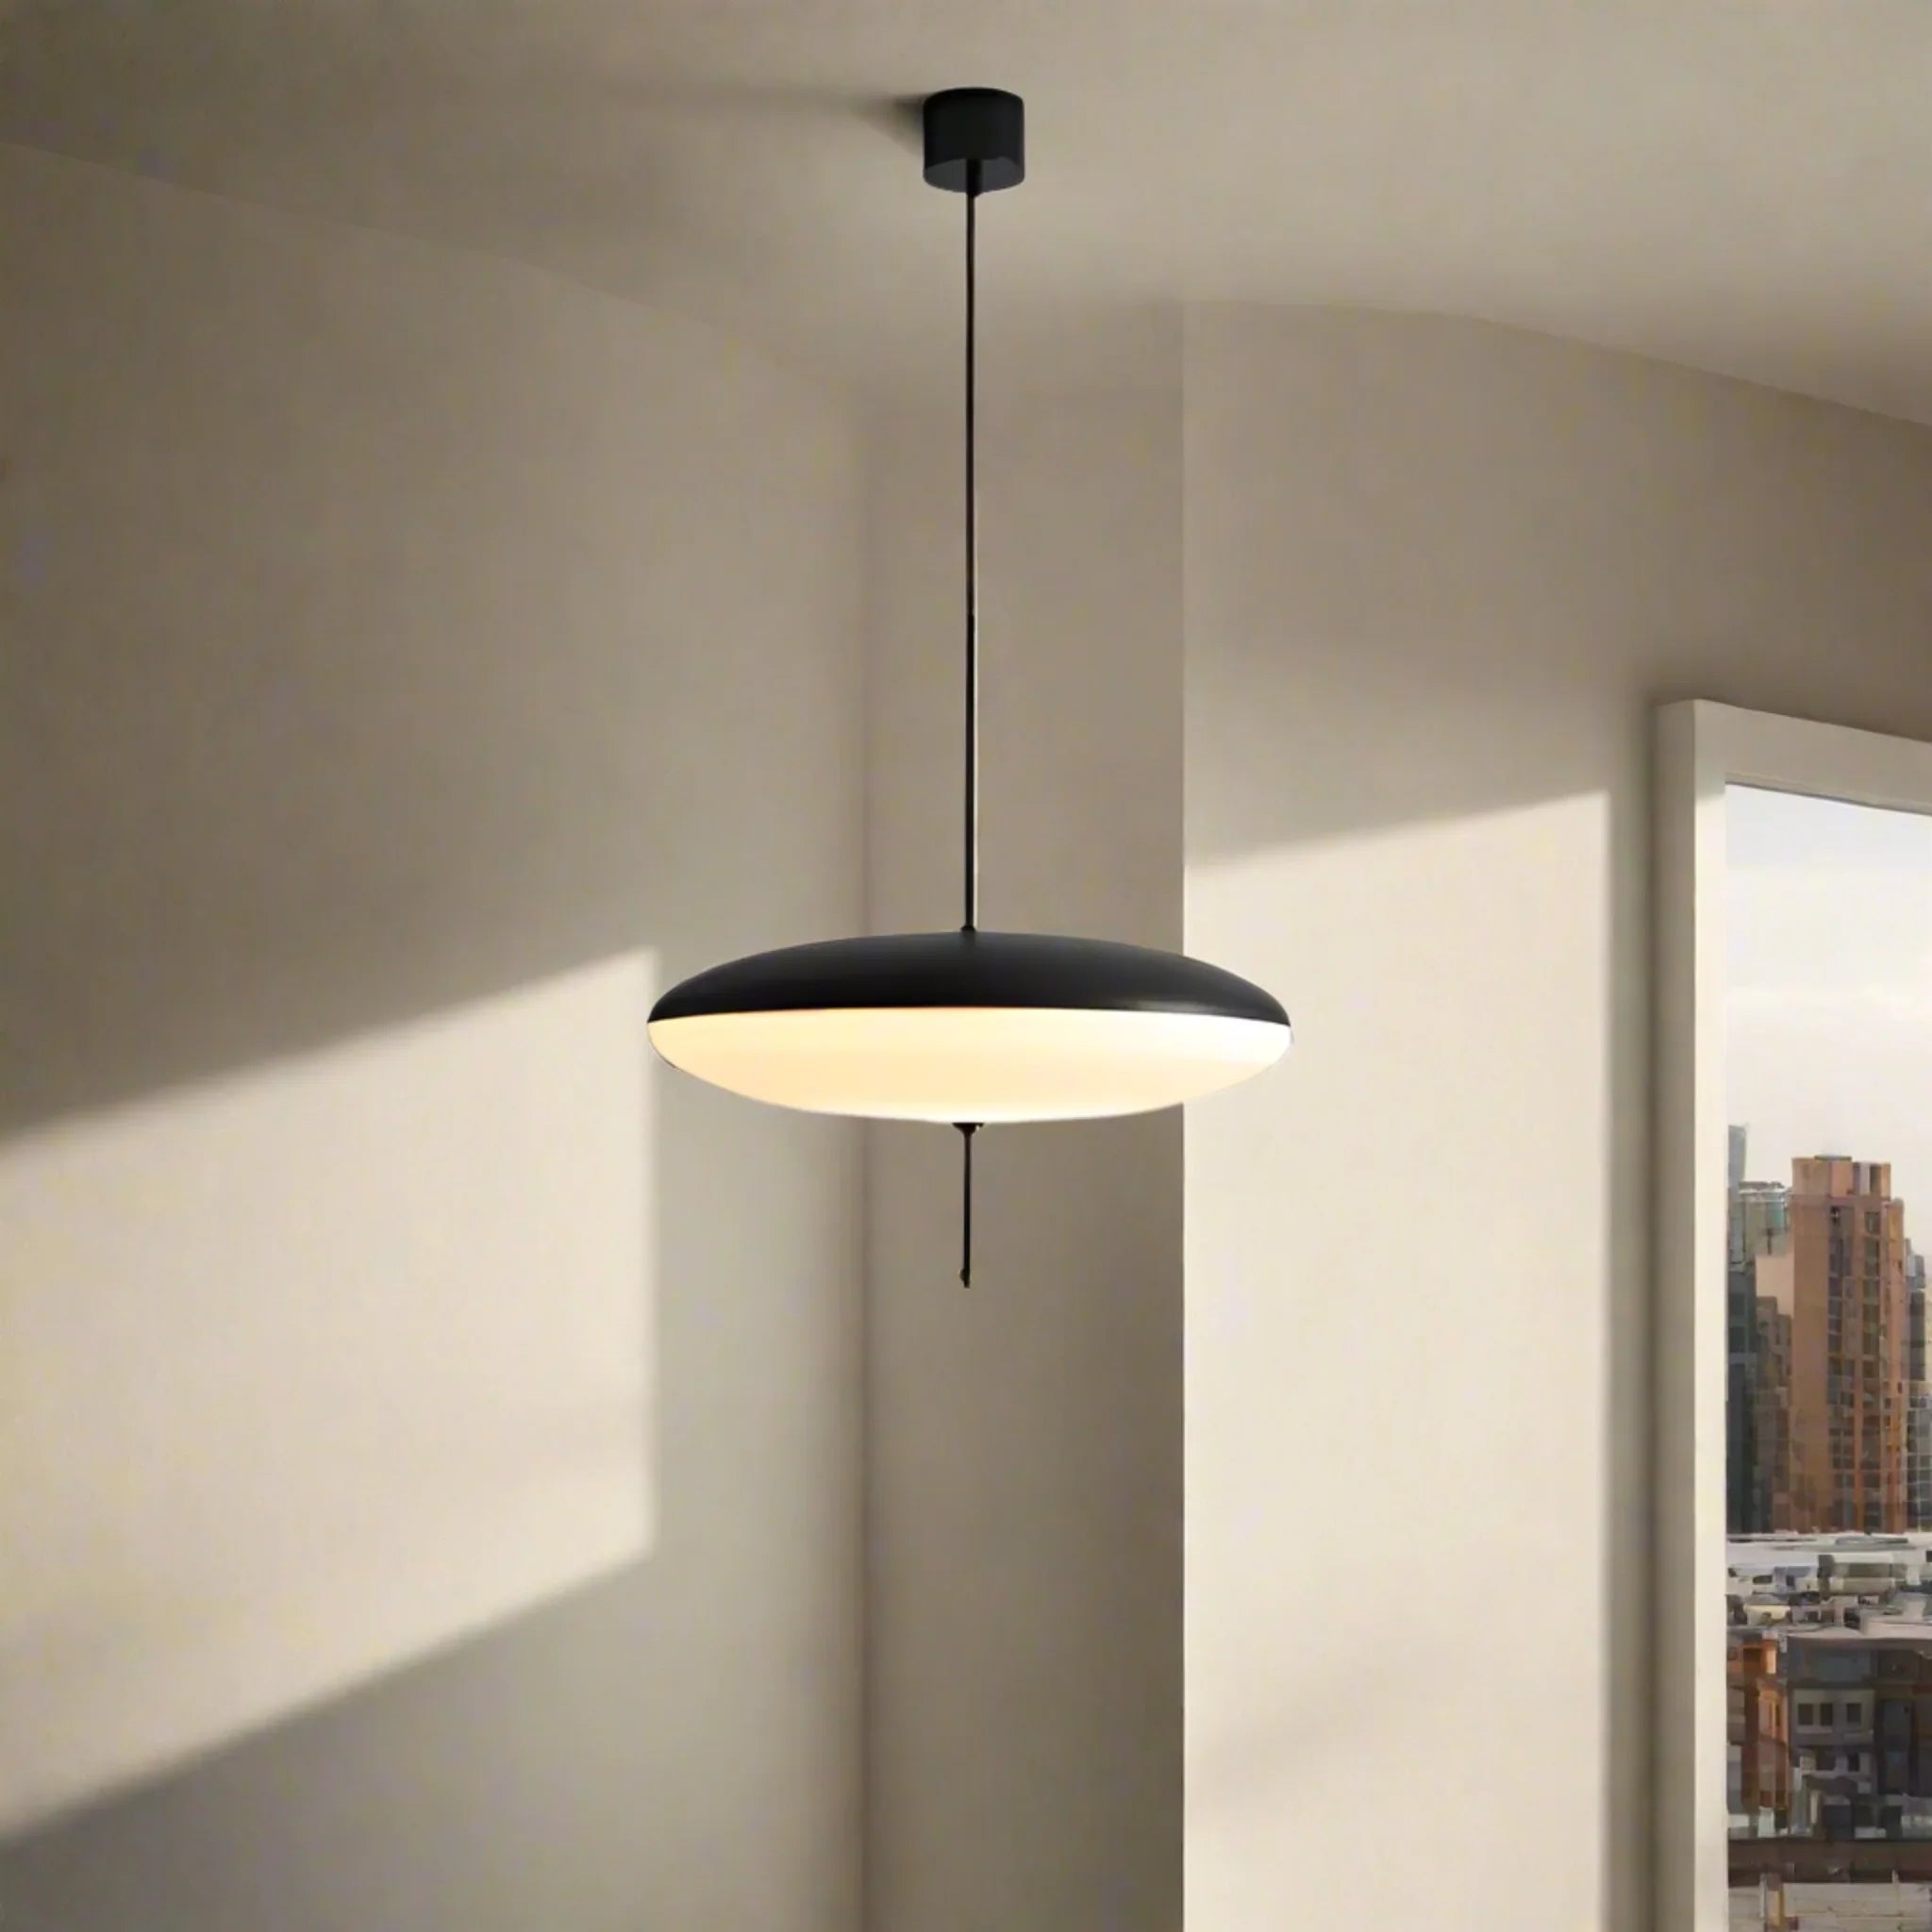
If you prefer modern, energy-efficient lighting, the Skiva Saucer Nordic LED Pendant Ceiling Light combines minimalist Nordic design with easy ceiling mount installation and included LED bulbs. The saucer shape provides broad, even illumination that works beautifully over dining areas and home offices.
Perfect Pendants for Your First DIY Project

Dropa Glass Drop Pendant Light for Kitchen Dining
$79.00
$119.00
Affordable glass drop pendant with adjustable 59-inch cord. Simple E26 base installation makes it ideal for DIY beginners seeking Nordic style at just $79. Learn more ➔

Skiva Saucer Nordic LED Pendant Ceiling Light
$179.00
$219.00
Modern saucer-shaped LED pendant with minimalist Nordic design. Easy ceiling mount installation with included LED bulbs, priced from $179. Learn more ➔
When to Call a Professional Electrician
While many DIY pendant light projects fall well within a homeowner's capabilities, certain situations warrant professional expertise. If your junction box is loose, damaged, or missing entirely, an electrician should install proper support. Similarly, if you're adding a new light fixture where none existed previously, running new wiring through walls requires permits and professional knowledge in most jurisdictions.
Aluminum wiring, found in some homes built between 1965 and 1973, requires special handling and connectors—this is not a place for DIY experimentation. When in doubt, consulting a licensed electrician costs significantly less than repairing fire damage or medical bills from electrical accidents.
For authoritative guidance on electrical safety and code requirements, consult the National Electrical Code (NEC) standards or the Consumer Product Safety Commission guidelines on home electrical safety.
Creating Your Perfect Lighting Moment
Installing your own pendant light is more than a home improvement project—it's an act of creating atmosphere, of shaping how you experience your most intimate spaces. The confidence gained from successfully wiring and hanging a fixture extends beyond the electrical realm; it represents your ability to curate your environment intentionally.
Whether you choose the organic artistry of the Driva Sculptural Cloud Pendant, the approachable elegance of the Dropa Glass Drop, or the modern efficiency of the Skiva Saucer LED, your DIY pendant light becomes a daily reminder of your capability and creativity. At Skonne, we're honored to provide the fixtures that make these moments possible—lighting that honors both Scandinavian design heritage and your personal journey of making a home.
Frequently Asked Questions about DIY Pendant Lights
The general rule for pendant lights is to hang them 30 to 36 inches above a dining table or kitchen island surface. For standard 8-foot ceilings, the bottom of the pendant should be approximately 60 inches from the floor. When installing multiple pendants, space them 24 to 30 inches apart for balanced illumination. The fixture width should be roughly one-third the width of the surface below it.
To make a simple pendant light, start with a DIY pendant light kit from your local hardware store. Choose a shade material—woven baskets, glass jars, fabric drums, or wire frames all work beautifully. Attach your chosen shade to the pendant socket following the kit instructions, ensuring any flammable materials stay at least 3 inches from the bulb. Use LED bulbs to minimize heat, and always follow electrical safety guidelines when wiring.
Yes, you can install ceiling lights without hardwiring. Plug-in pendant lights use a swag hook to drape the cord across the ceiling and down to a wall outlet—perfect for renters. Battery-operated LED pendants offer wireless installation but require periodic battery changes. Solar-powered options work well in sunlit spaces. Wireless puck lights with remote controls provide ambient lighting without any wiring at all.
Installing a pendant light involves several steps: First, turn off power at the circuit breaker and verify with a voltage tester. Remove the existing fixture and prepare the mounting bracket. Connect the wires—black to black (hot), white to white (neutral), and ground to ground—using wire nuts. Tuck wires into the junction box, attach the canopy, and restore power to test. Always follow manufacturer instructions and local electrical codes.
Alternatives to pendant lights include flush-mount ceiling fixtures for low ceilings, semi-flush mounts for medium heights, and chandeliers for formal spaces. Track lighting offers flexibility, while recessed can lights provide ambient illumination without visual clutter. Wall sconces free up ceiling space, and floor lamps with upward-facing shades can mimic pendant lighting effects. For temporary solutions, consider plug-in swag lights or battery-operated pendant alternatives.